Customers
Centralized customer management is key to providing excellent service and driving business growth. The Customers panel in BookWellNow acts as a robust CRM (Customer Relationship Management) hub, automatically compiling client profiles, booking histories, contact information, and appointment frequencies in one clean dashboard.
ℹ Quick Overview: BookWellNow automatically registers a new customer profile the moment a client books their first appointment online, saving your staff from manual database entry.
Step 1: Access the Manage Customers Panel
To view your business client list, log into your WordPress admin panel and navigate to:
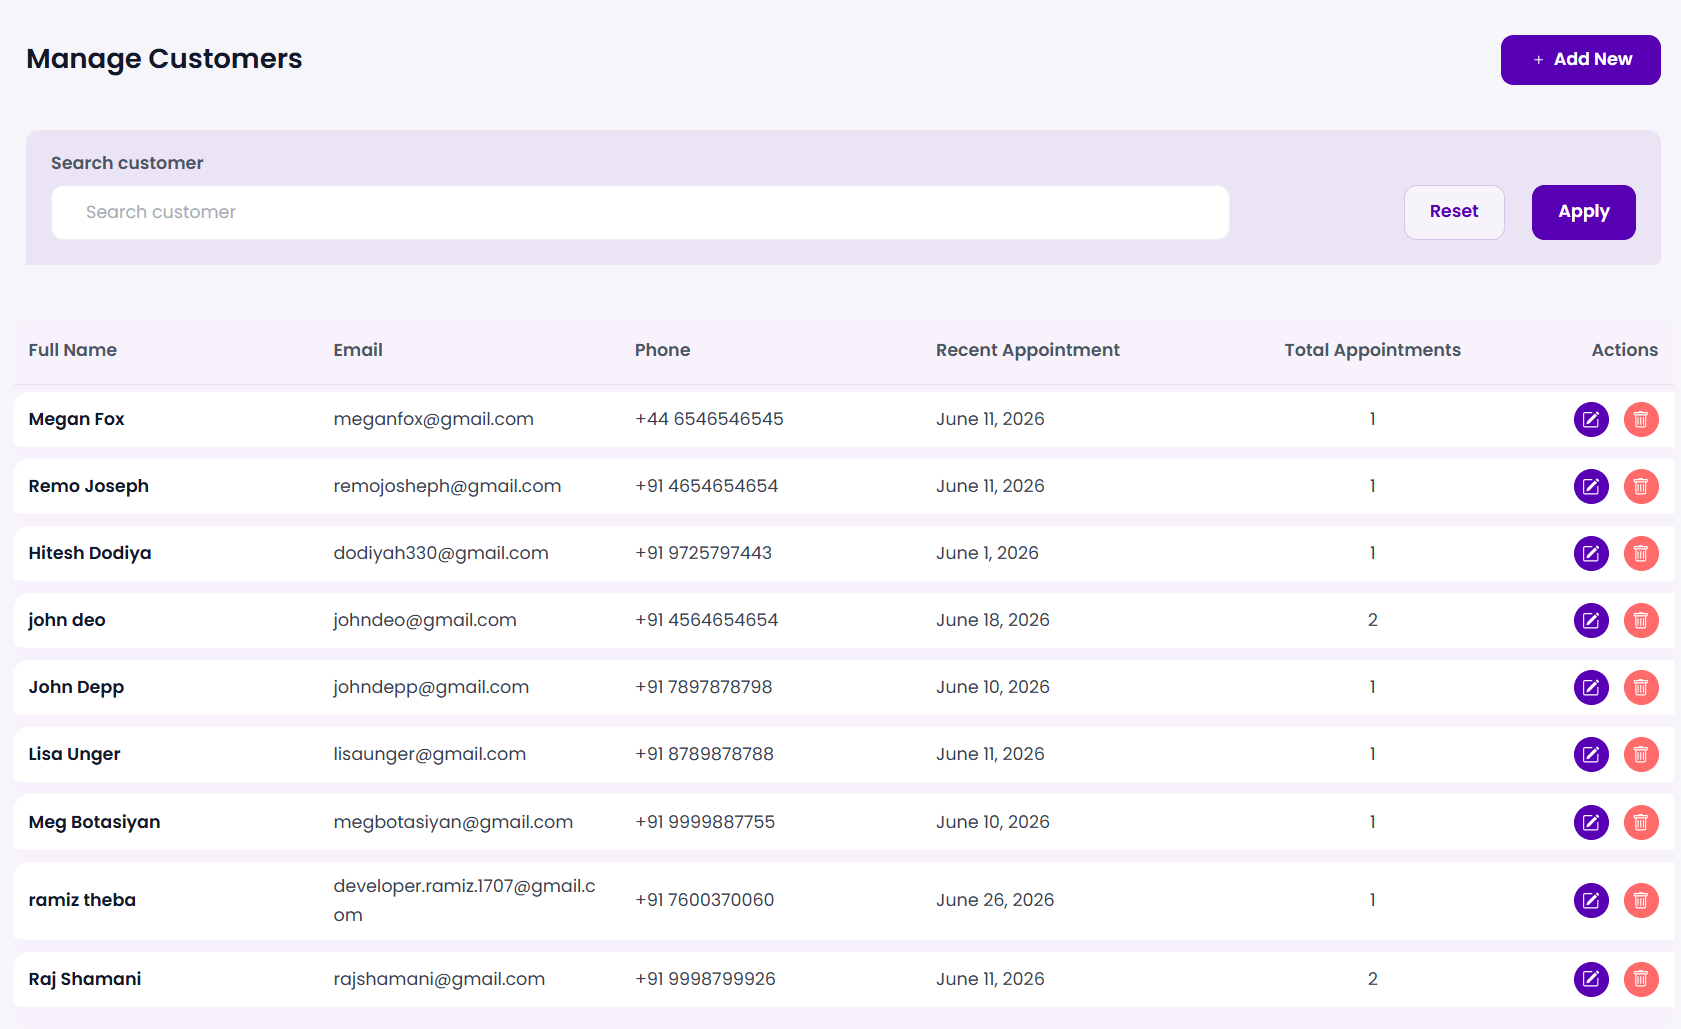
BookWellNow → CustomersThe main screen presents a clean, high-performance data table displaying all registered customers and their historical booking summaries at a glance.
Step 2: Search & Filter the Customer Directory
For businesses with large customer databases, locating specific profiles is simple. Use the Search customer filter panel located directly above the table:
- Enter the customer name, email address, or phone number in the search input box (e.g. “Jone Deo”).
- Click the purple Apply button to filter matching records.
- Click Reset to instantly clear the search filter and view the full directory again.
Step 3: Inspect Customer Profile Statistics
The customer database table enqueues several key columns to help you track client loyalty and schedule histories:
| Table Column | Data Displayed | Administrative Purpose |
|---|---|---|
| Full Name | Client’s first and last name | Primary identifier for appointment records |
| Registered primary email address | Used for automated booking confirmations and notifications | |
| Phone | Contact number with international prefix | Enables SMS reminders and direct customer follow-ups |
| Recent Appointment | Date of the customer’s latest booking | Helps track customer engagement and dormancy periods |
| Total Appointments | Total appointment counter (lifetime bookings) | Allows you to quickly identify your most loyal, VIP customers |
| Actions | Inline Edit (purple) and Delete (red) buttons | Edit profile details or delete customer records inline |
💡 Marketing Tip: Use the “Total Appointments” column to identify VIP customers who have booked multiple times, and target them with exclusive email promotions!
Step 4: Add a New Customer Manually
While most profiles are created automatically during online checkout, administrators can register walk-in or phone-in clients manually:
- Click the primary purple + Add New button in the top-right corner of the screen.
- An interactive Add New Customer popup modal will instantly appear on your screen.
- Configure the mandatory customer details:
- First Name: Enter the client’s first name.
- Last Name: Enter the client’s last name.
- Email: Enter a valid primary email address.
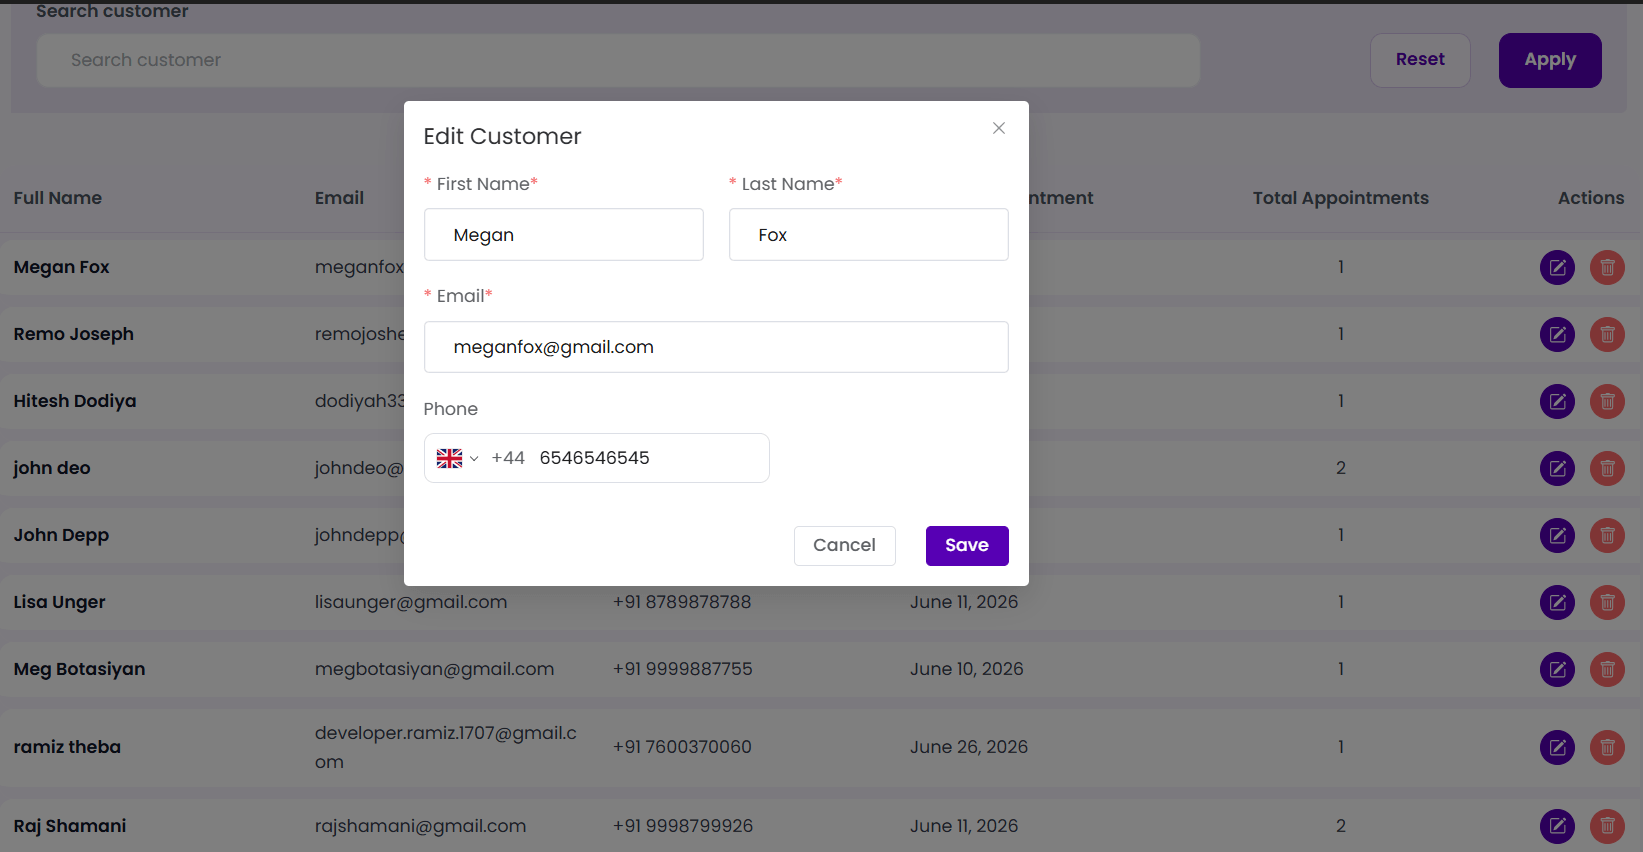
- Phone: Input the client’s phone number. The field includes a premium country flag select dropdown to automatically apply international dialing prefixes.
- Click Save to register the customer. Click Cancel or tap the close (
×) icon to close the modal without writing to the database.