Manage Categories
Categories help you organize multiple services into clean, collapsible departments (e.g. separating Face Massage from Body treatments). This guide covers how to manage categories using the interactive Manage Categories Modal popup.
Step 1: Launch the Categories Modal
Log in to your admin panel and go to BookWellNow → Services. Click the secondary purple Manage Categories button next to the Add Service button to launch the category manager popup overlay.
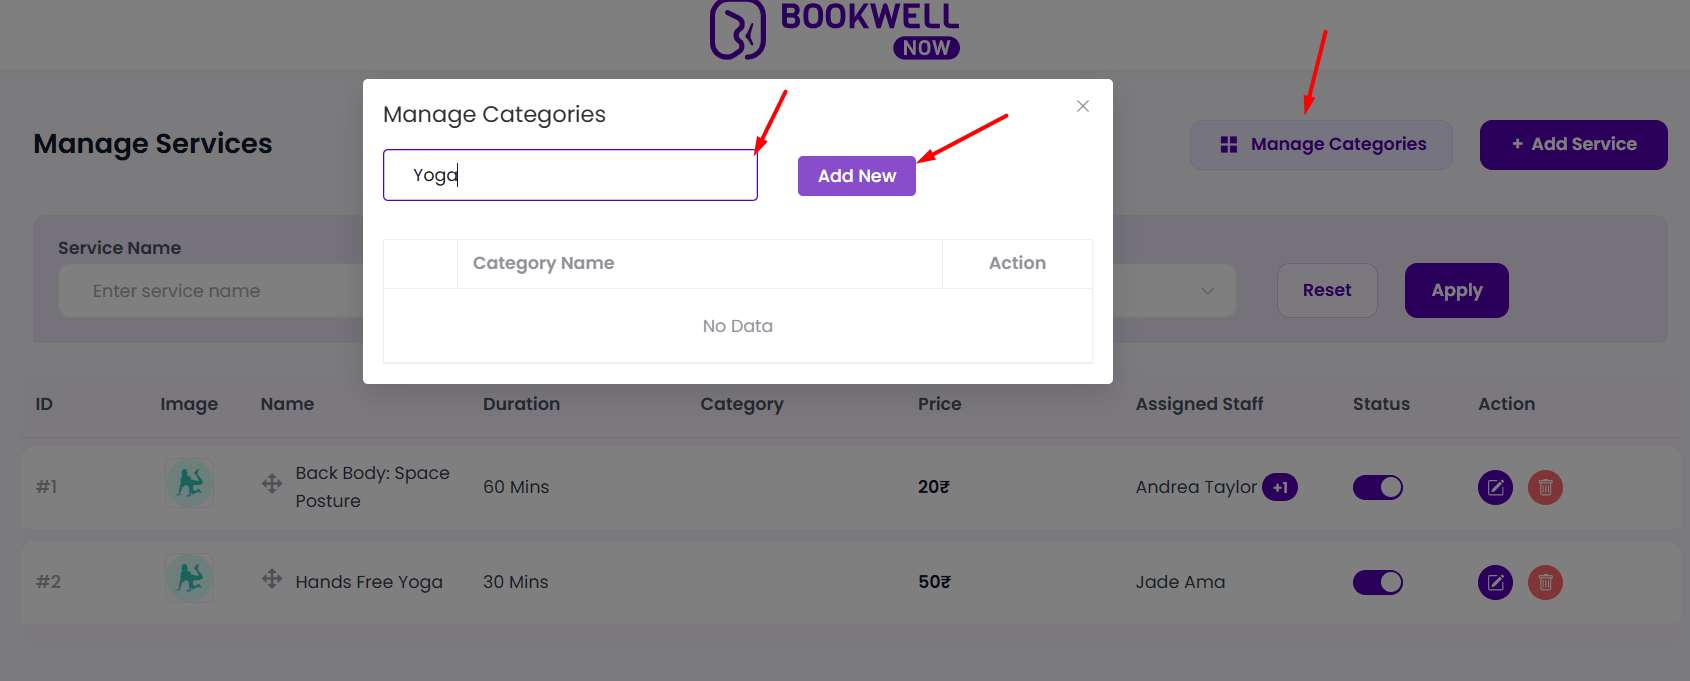
Step 2: Create a New Category
To register a new service category quickly:
- Enter the title in the Category Name text field (e.g. “Face Massage”).
- Click the purple Add New button.
- The category is immediately added to the data list table below, available for selection when editing services.
Step 3: Drag-and-Drop Category Ordering
Just like services, you can rearrange the display order of categories on your public booking checkout forms:
- Locate the drag handle icon (
☰) on the left side of the category row. - Click and drag the row to your preferred sequence.
- Release to save. The categories will now appear in this exact order on your frontend checkout wizard!
Step 4: Edit and Delete Categories
Each row in the category table has action items under the “Action” column:
- Edit Category: Click the purple Edit button to rename the category inline.
- Delete Category: Click the red Trash button to delete the category.