Add & Edit Service
Creating and updating services in BookWellNow is incredibly smooth. Clicking the primary + Add Service button on the services page launches a sleek sliding drawer panel on the right side of the screen, allowing you to configure all parameters without leaving the main dashboard page.
Step 1: Upload a Premium Service Image
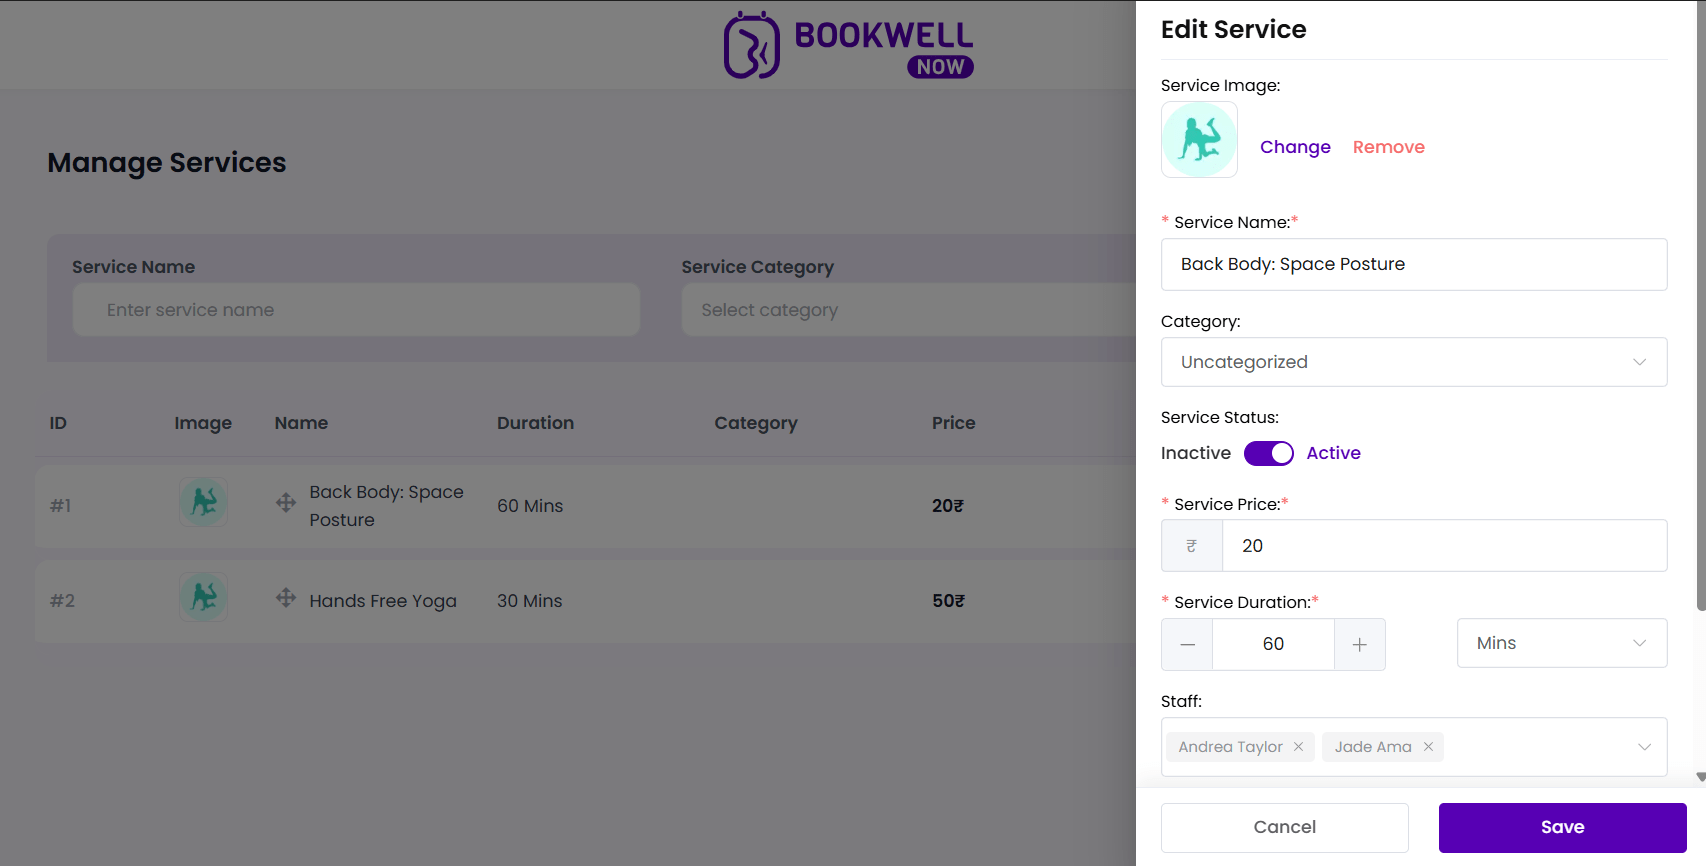
Click the Upload Photo button under the Service Image section. Select or upload a high-resolution, square image (recommended size: 300px x 300px) to represent the service.
💡 Design Tip: Harmonized, professional service photos greatly enhance visual trust and checkout engagement!
[screenshot]
Step 2: Set Service Name & Category
Enter the public title of your service in the mandatory Service Name text field. Next, assign the service to an active category using the Category select dropdown (e.g. Uncategorized, or select an existing category).
Step 3: Set Status & Pricing
Toggle the Service Status switch to Active to make the service immediately available for scheduling, or set it to Inactive if you are still setting up details.
Enter the cost of the service in the Service Price field. The primary currency symbol ($) is automatically enqueued as a prefix next to the text box.
Step 4: Adjust Duration & Add Description
Define the time slot length allocated for the appointment:
- In the Service Duration control, use the increment buttons (
-and+) to easily dial in the duration, or type the number directly in the box (e.g.30Mins). - Use the dropdown list next to the duration field to toggle units between Mins and Hours.
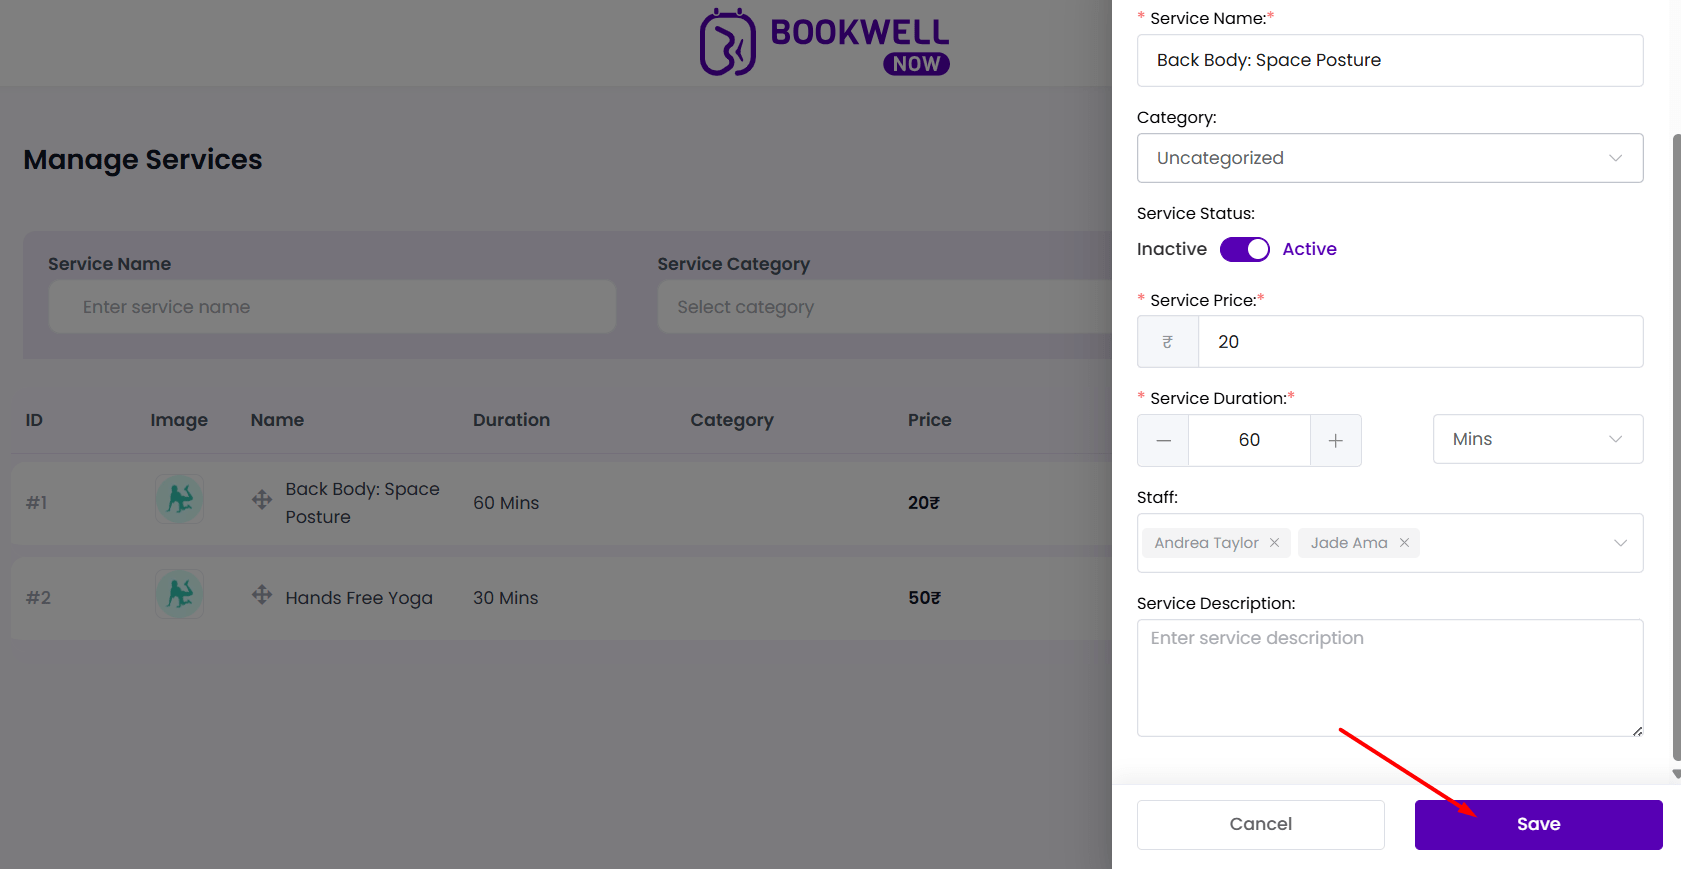
- Enter a thorough description detailing what the service includes in the Service Description text box. This description will show up as an informational bubble for clients during scheduling.
Step 5: Save the Service
Review your configurations, and click the primary purple Save button at the bottom-right of the drawer to write the service to your database. Click Cancel to close the drawer panel without saving changes.
Day and multi-day durations
The Free service editor supports Mins, Hours and Days. Select Days for longer appointments; the current editor permits up to 30 days. Save the service and verify it against the assigned staff schedule and availability.
A duration in days does not bypass staff availability rules. Test the full booking span before offering a long service publicly.