Booking Form Appearance
The Booking Form Appearance tab provides comprehensive styling tools to customize the colors, font styles, sizes, and layout parameters of the front-end scheduling wizard to match your website’s design.
Step 1: Open the Appearance Designer
Navigate to: BookWellNow → Settings and select the Booking Form Appearance tab.
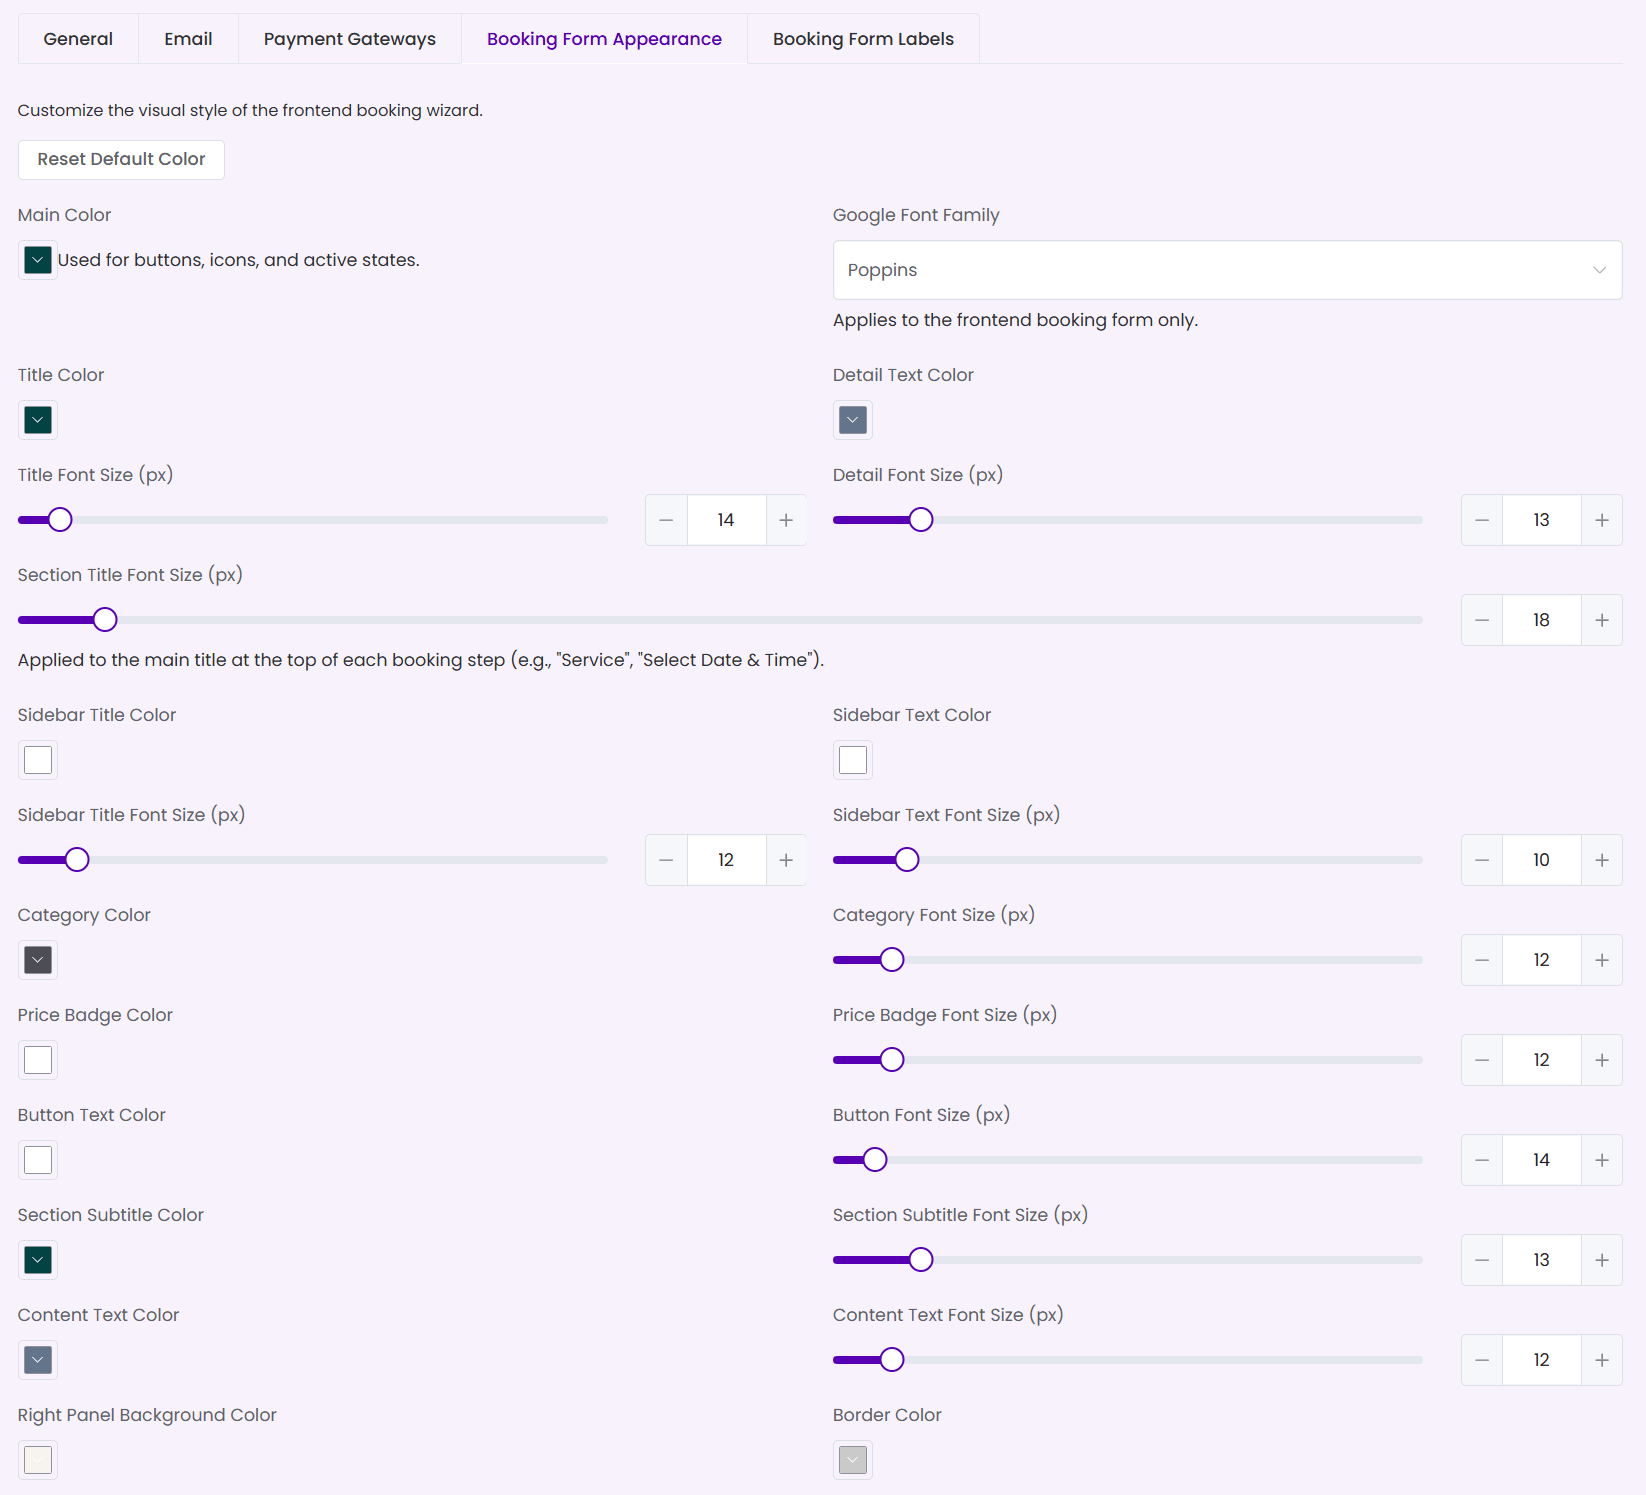
Step 2: Form Type
Choose how the booking form is displayed on your site:
- Small Booking Wizard: Shows the step-by-step booking wizard (service, staff, date & time, details, summary).
- Service List with Popup: Displays a list of services and opens the booking wizard in a popup.
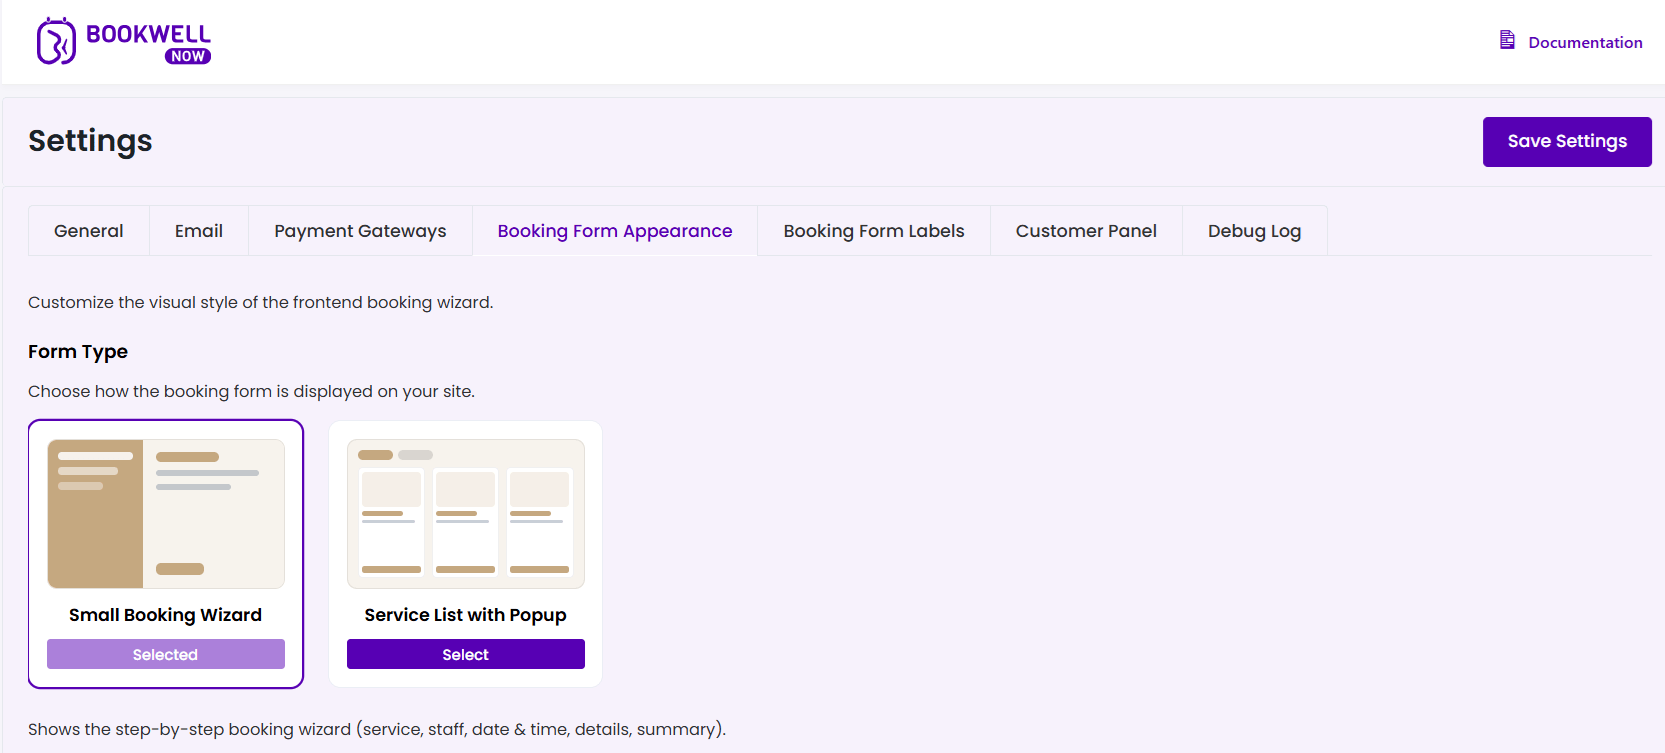
Step 3: Customized Form Options
Control specific visibility settings on the frontend booking form:
- Hide Description (Default Off): If ON, service descriptions are hidden on the frontend booking form.
- Show Staff Position (Default Off): If ON, staff position is shown under the staff name on the booking form.
- Hide Categories (Default Off): If ON, category selection will be hidden on the frontend booking page.
- Hide Staff Selection Step: If ON, customers will skip staff selection and be assigned a staff member automatically.
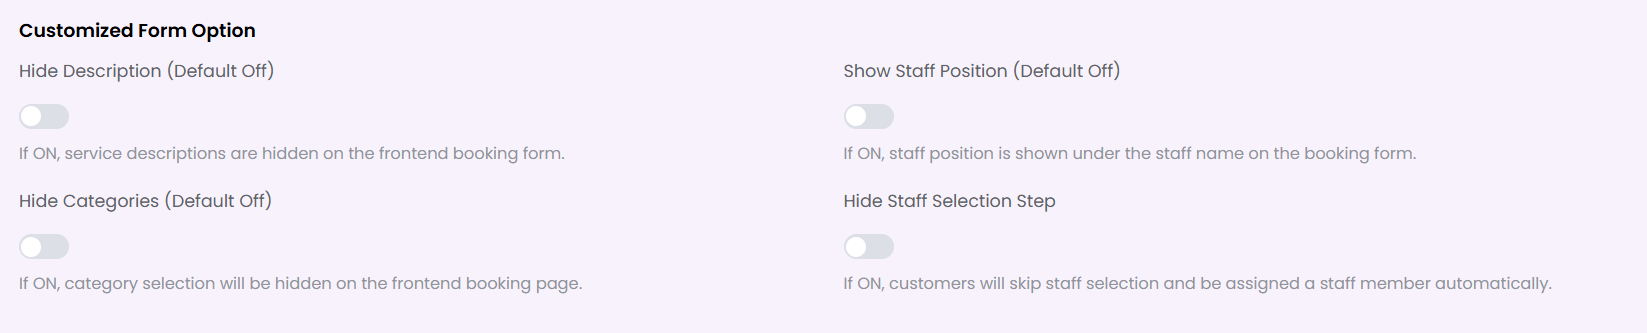
Step 4: Apply a Predefined Theme
If you prefer a ready-made design instead of tweaking individual colors, you can easily apply a professionally designed preset. These themes automatically configure the primary brand colors, typography spacing, and sidebar aesthetics for a cohesive look.
- Choose from 10 premium presets, including Ocean Blue, Midnight Navy, Corporate Steel, Professional Teal, and more.
- Click the Apply button under the theme card to instantly load its styles into the Customize Appearance Settings panel below.
- Once applied, you can still manually adjust specific colors or fonts as needed.
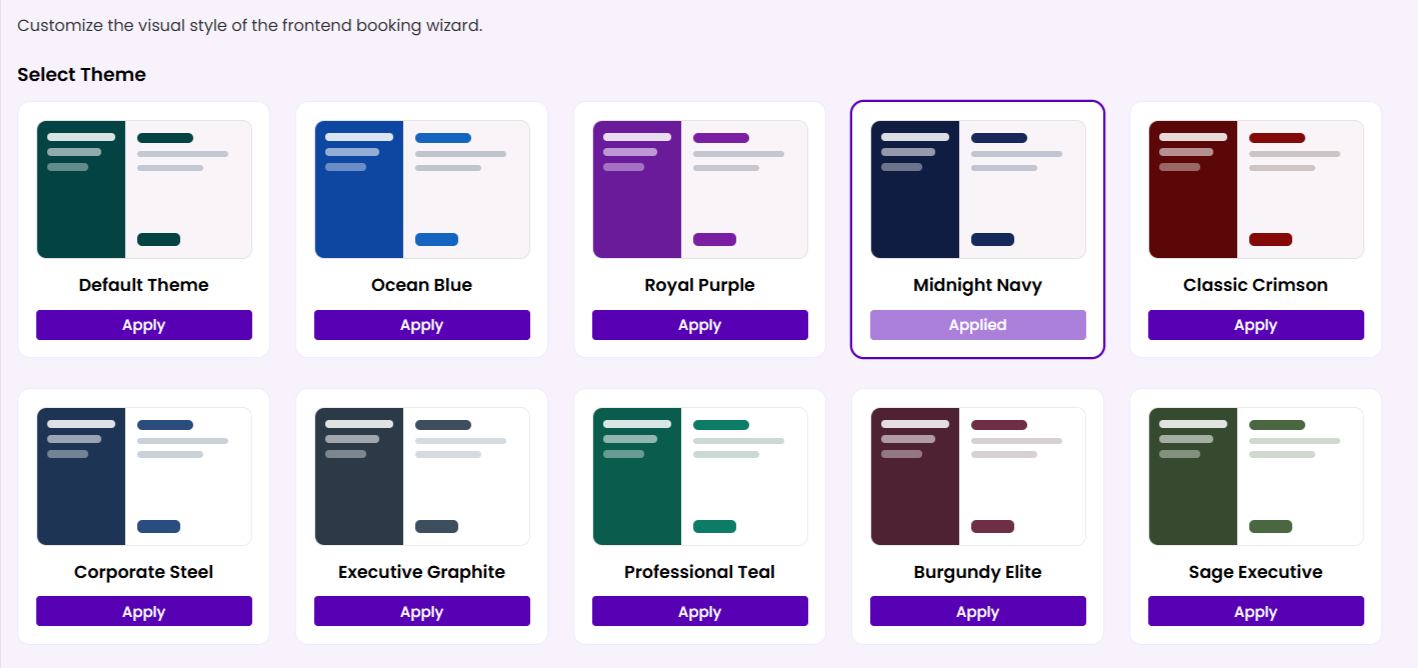
Step 5: Customize Brand Palette
Set custom colors for active items, buttons, and titles using the color picker inputs:
- Main Color: Sets the primary color for buttons, active state indicators, and icons.
- Title Color: Controls the color of step headings.
- Detail Text Color: Controls sub-headings and supporting descriptions.
- Sidebar Title / Text Color: Styles the navigation sidebar.
- Category / Price Badge / Button Text Color: Adjusts specific checkout highlights.
Step 6: Select Google Fonts
Customize the typography used on the front-end wizard:
- Select a font from the Google Font Family dropdown list (e.g. “Poppins”, “Inter”, “Montserrat”).
- This setting applies only to the front-end booking form, keeping it independent from your WordPress admin panel font style.
Step 7: Fine-Tune Font Sizes
Use the slider controls or input boxes to adjust element font sizes in pixels (px):
- Title Font Size: Sets the size of standard step labels (default:
14px). - Detail Font Size: Sets the size of supporting texts (default:
13px). - Section Title Font Size: Sets the size of step titles (e.g. “Service”, default:
18px). - Sidebar / Category / Button Sizes: Fine-tune visual proportions.
Step 8: Revert Changes (Optional)
If you want to discard your custom styling and return to the plugin’s default design, simply click the Reset Default Color button at the top of the form.
💡 Styling Tip: Set the Main Color to match your website’s primary branding color. This integrates the booking form widget seamlessly into your pages!