Zoom Integration
Follow these steps to seamlessly connect your Zoom account with BookWellNow to automatically generate meeting links for your appointments.
Step 1: Navigate to Integrations
In your WordPress Dashboard, navigate to Book Well Now -> Settings -> Integrations. Keep this tab open, as you will need to paste your Zoom credentials here later.
Step 2: Build a Zoom App
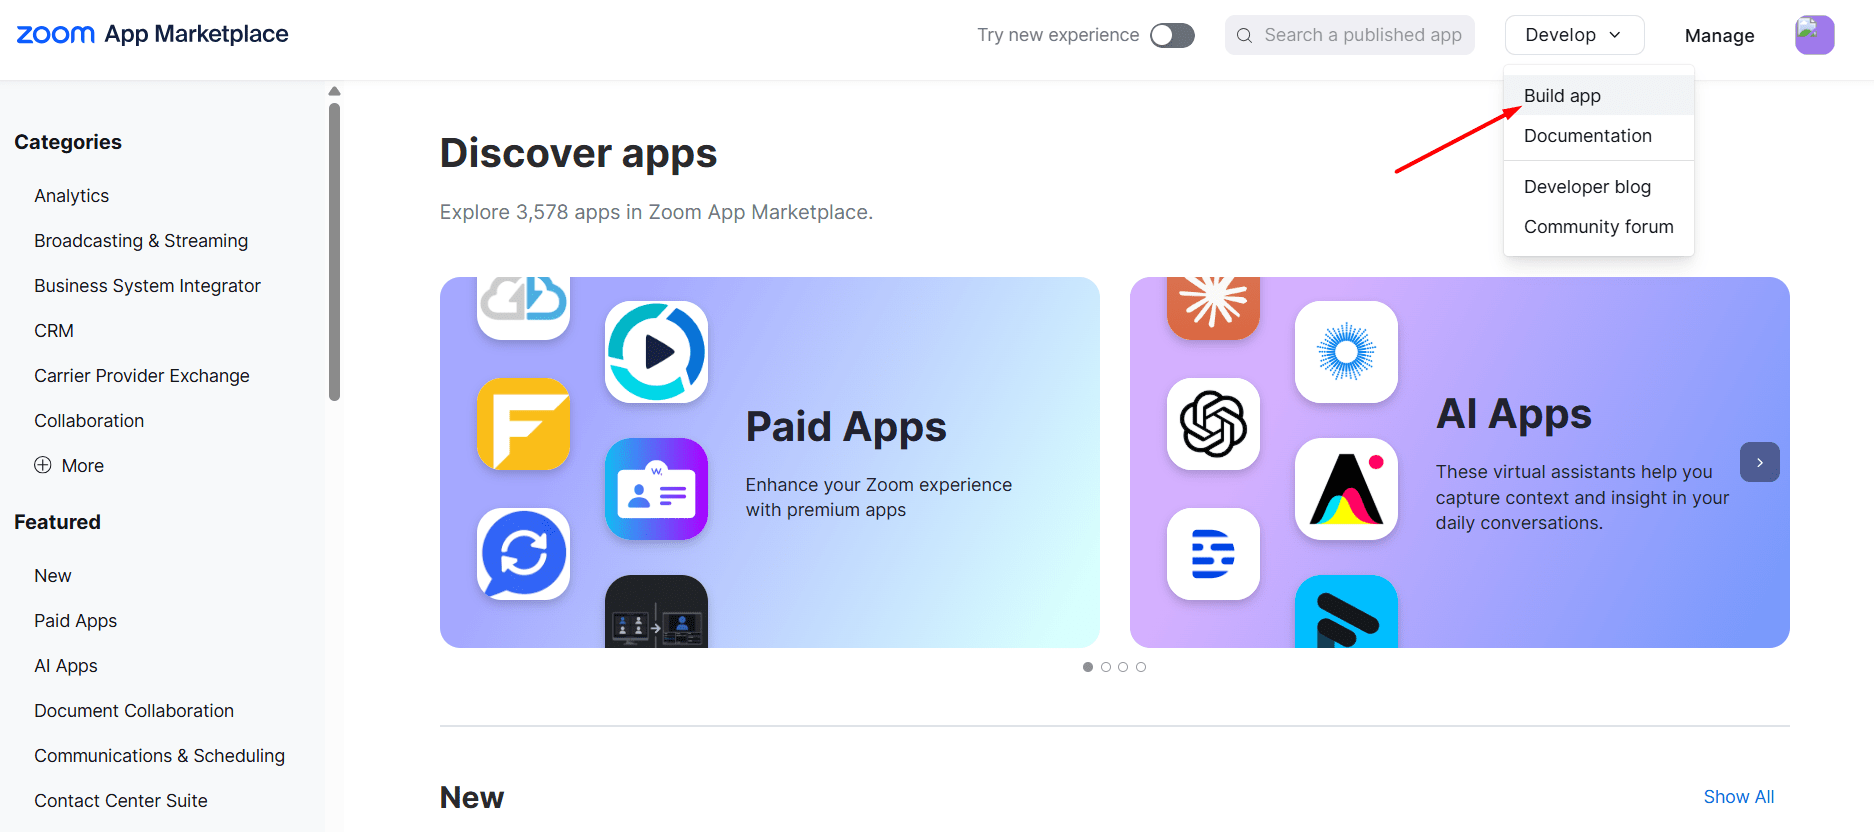
Go to the Zoom App Marketplace. Ensure you are logged into your Zoom account. In the top right corner, click on the Develop dropdown menu and select Build app.
Step 3: Choose App Type
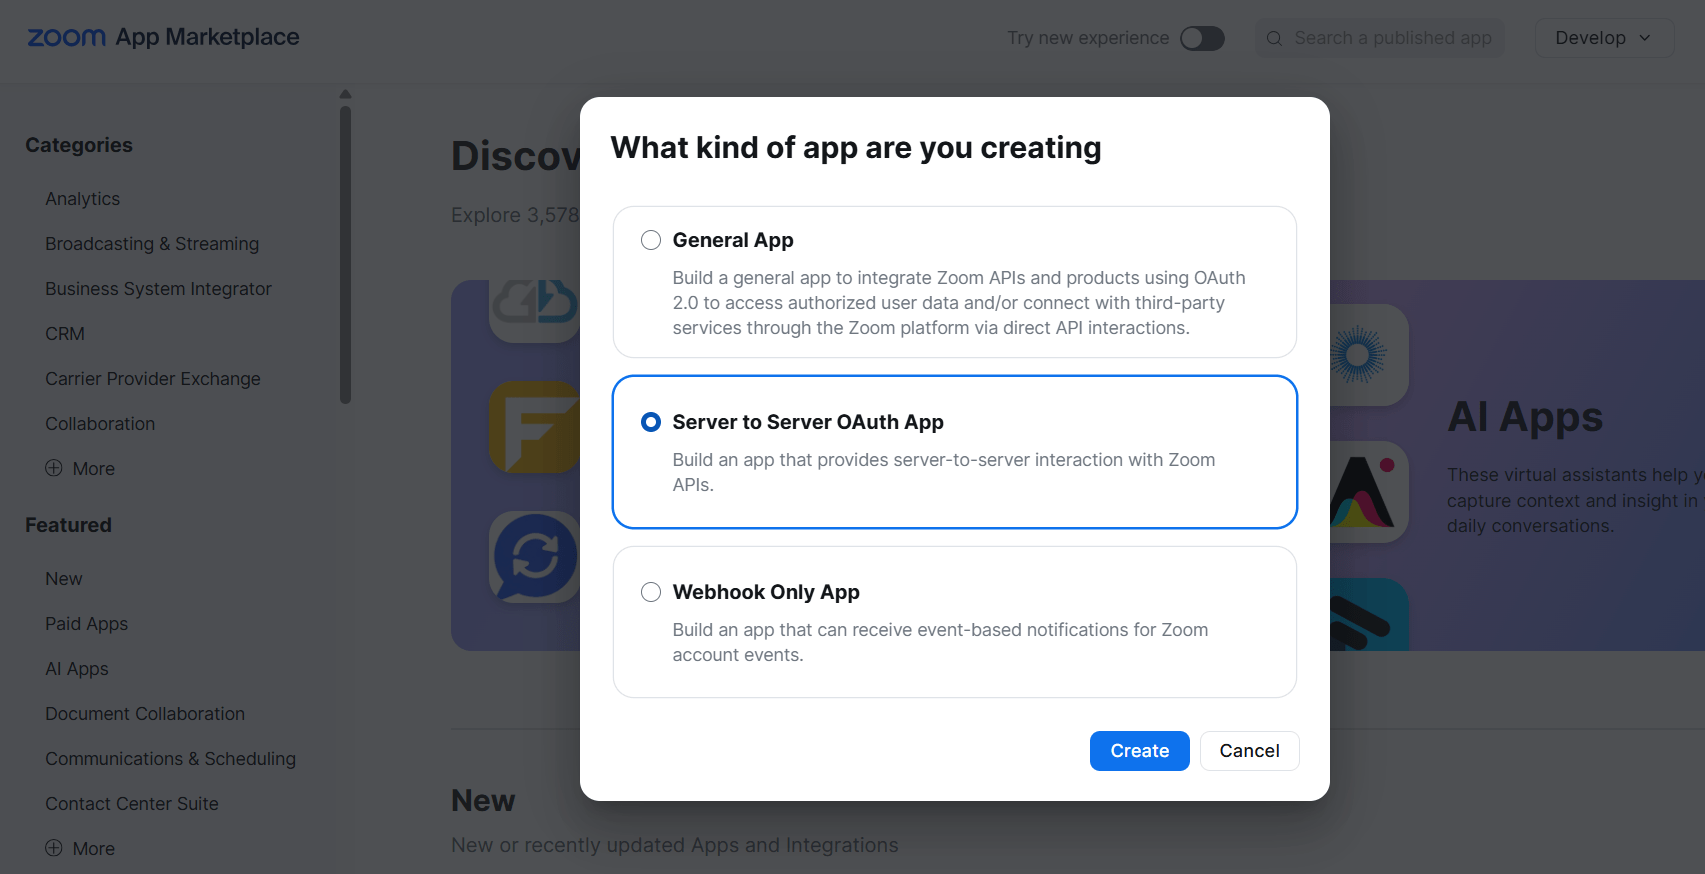
A dialog box will appear asking “What kind of app are you creating?”. Select the Server to Server OAuth App option and click Create.
Step 4: Name Your App
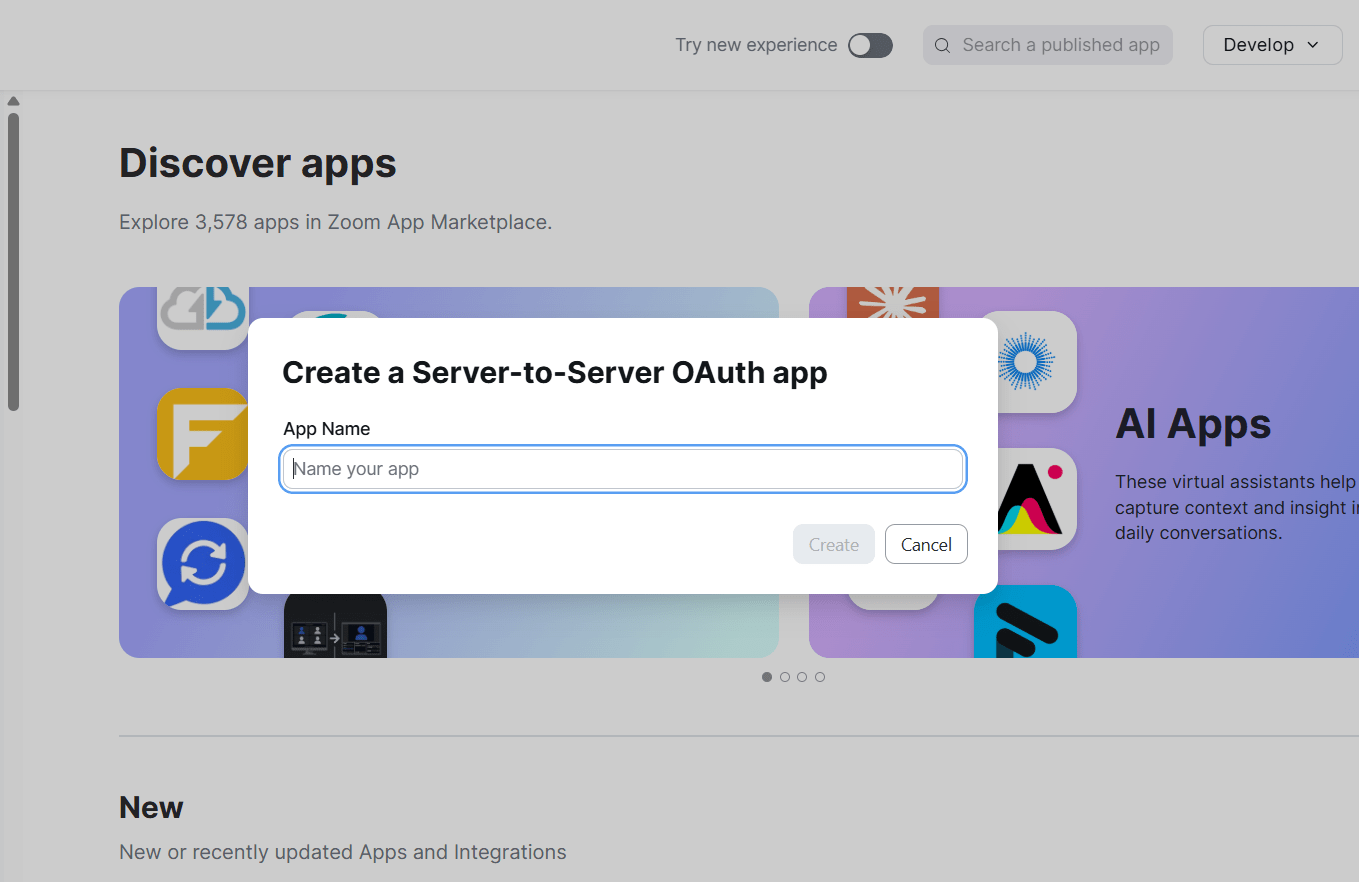
You will be prompted to name your application. Enter a recognizable App Name (for example, “BookWellNow Zoom Meeting”) and click Create.
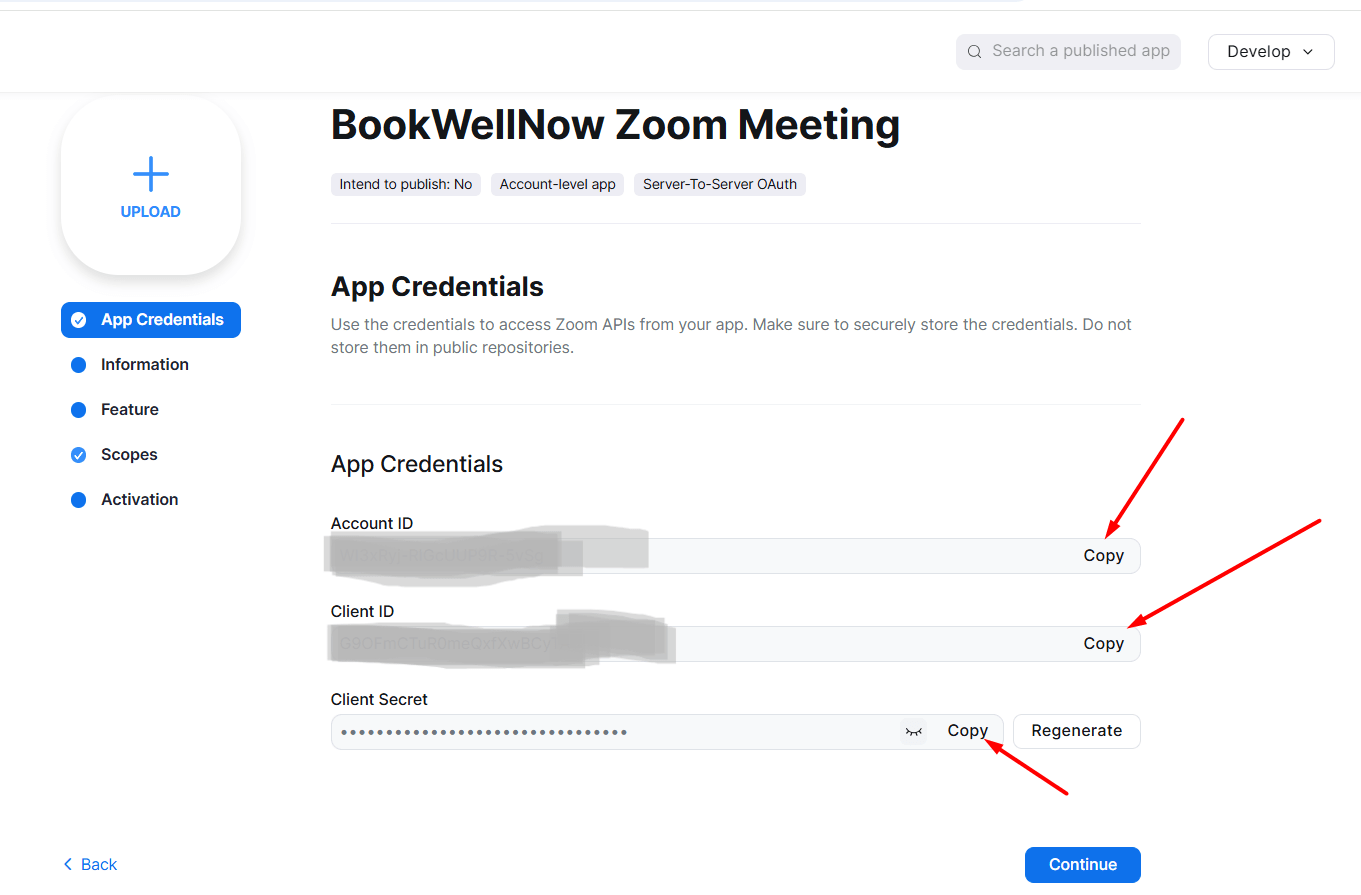
Step 5: Copy Your App Credentials
You will be redirected to the App Credentials page. Here, you will find three important keys: your Account ID, Client ID, and Client Secret. Click the Copy button next to each of these and paste them into the corresponding fields in your Book Well Now Integrations settings (from Step 1).
Step 6: Add Meeting Scopes
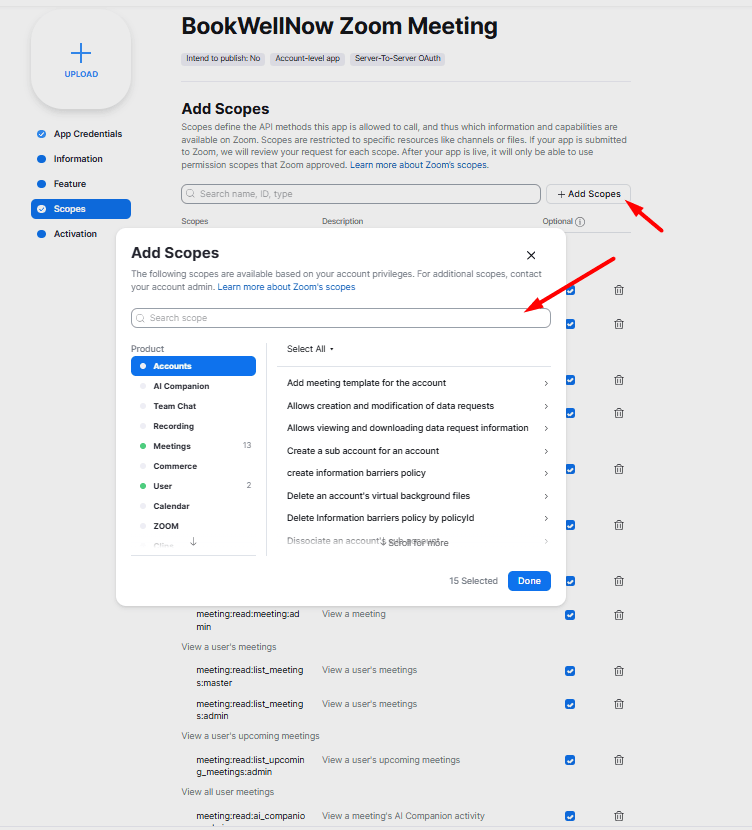
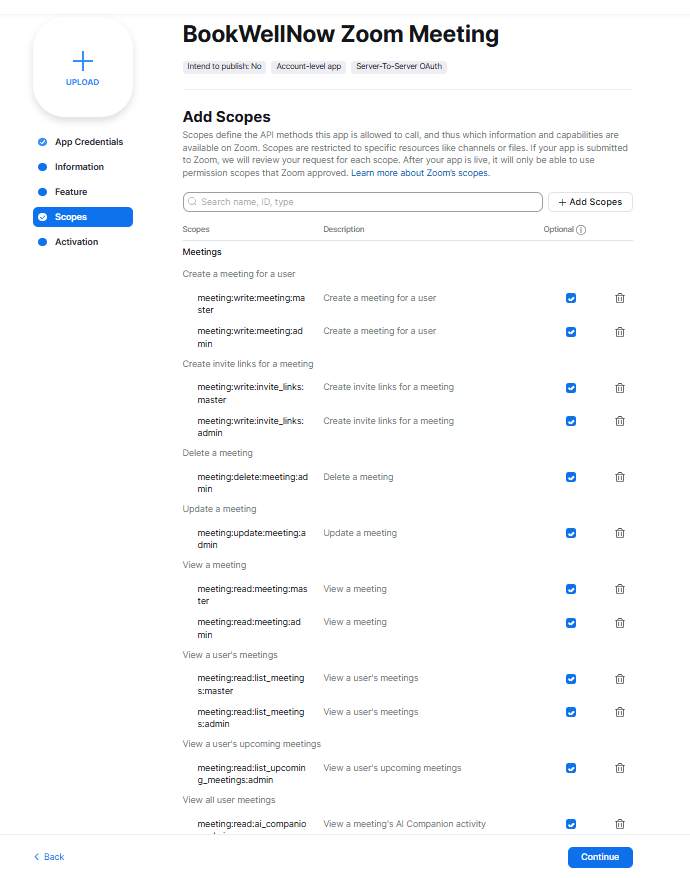
In the left sidebar menu, click on the Scopes tab, then click the + Add Scopes button. In the modal that appears, expand the Meetings section. Check the boxes for the necessary meeting scopes (such as meeting:write:meeting:master, meeting:write:meeting:admin, meeting:write:invite_links, etc.) so BookWellNow can create and manage meeting links.
Meeting Scopes selected
Step 7: Add User Scopes
While still in the Add Scopes modal, locate the User section. Check the boxes for the necessary user scopes (such as user:read:list_users:master and user:read:list_users:admin). Once all the required Meeting and User scopes are checked, click Done. Then, click the blue Continue button at the bottom of the page.
Step 8: Activate Your App
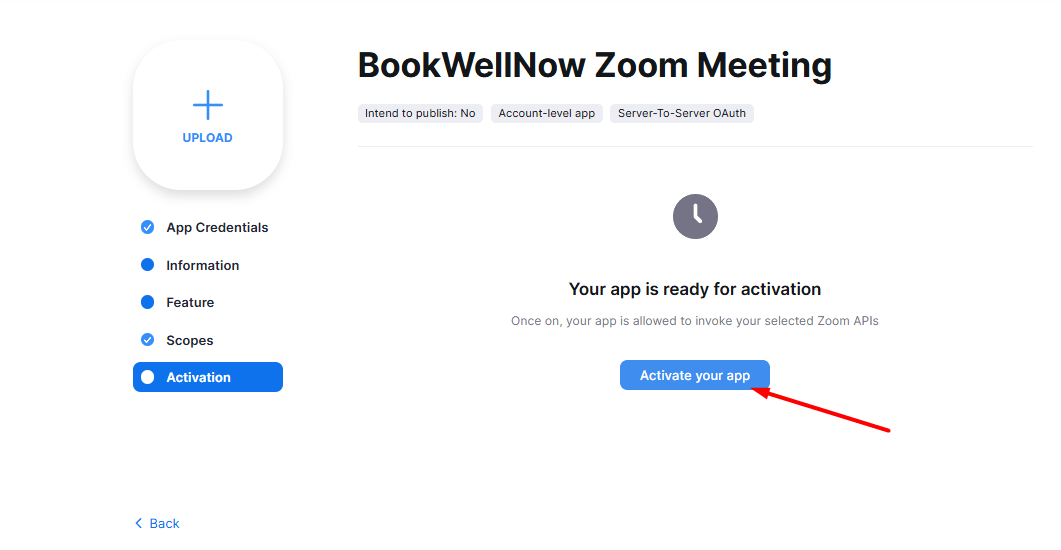
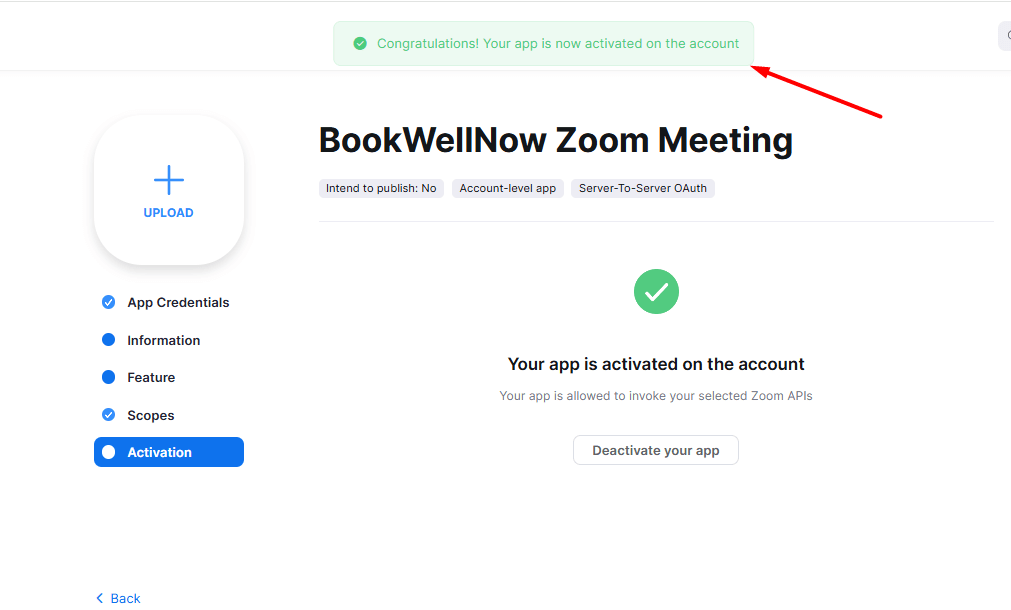
Next, click on the Activation tab in the left sidebar menu. You will see a screen indicating that “Your app is ready for activation”. Click the blue Activate your app button in the center of the screen.
Step 9: Confirm Activation
You will see a green success banner at the top of the screen saying “Congratulations! Your app is now activated on the account”, and a large green checkmark indicating the app is active. Your Zoom integration is now fully set up on Zoom’s side!
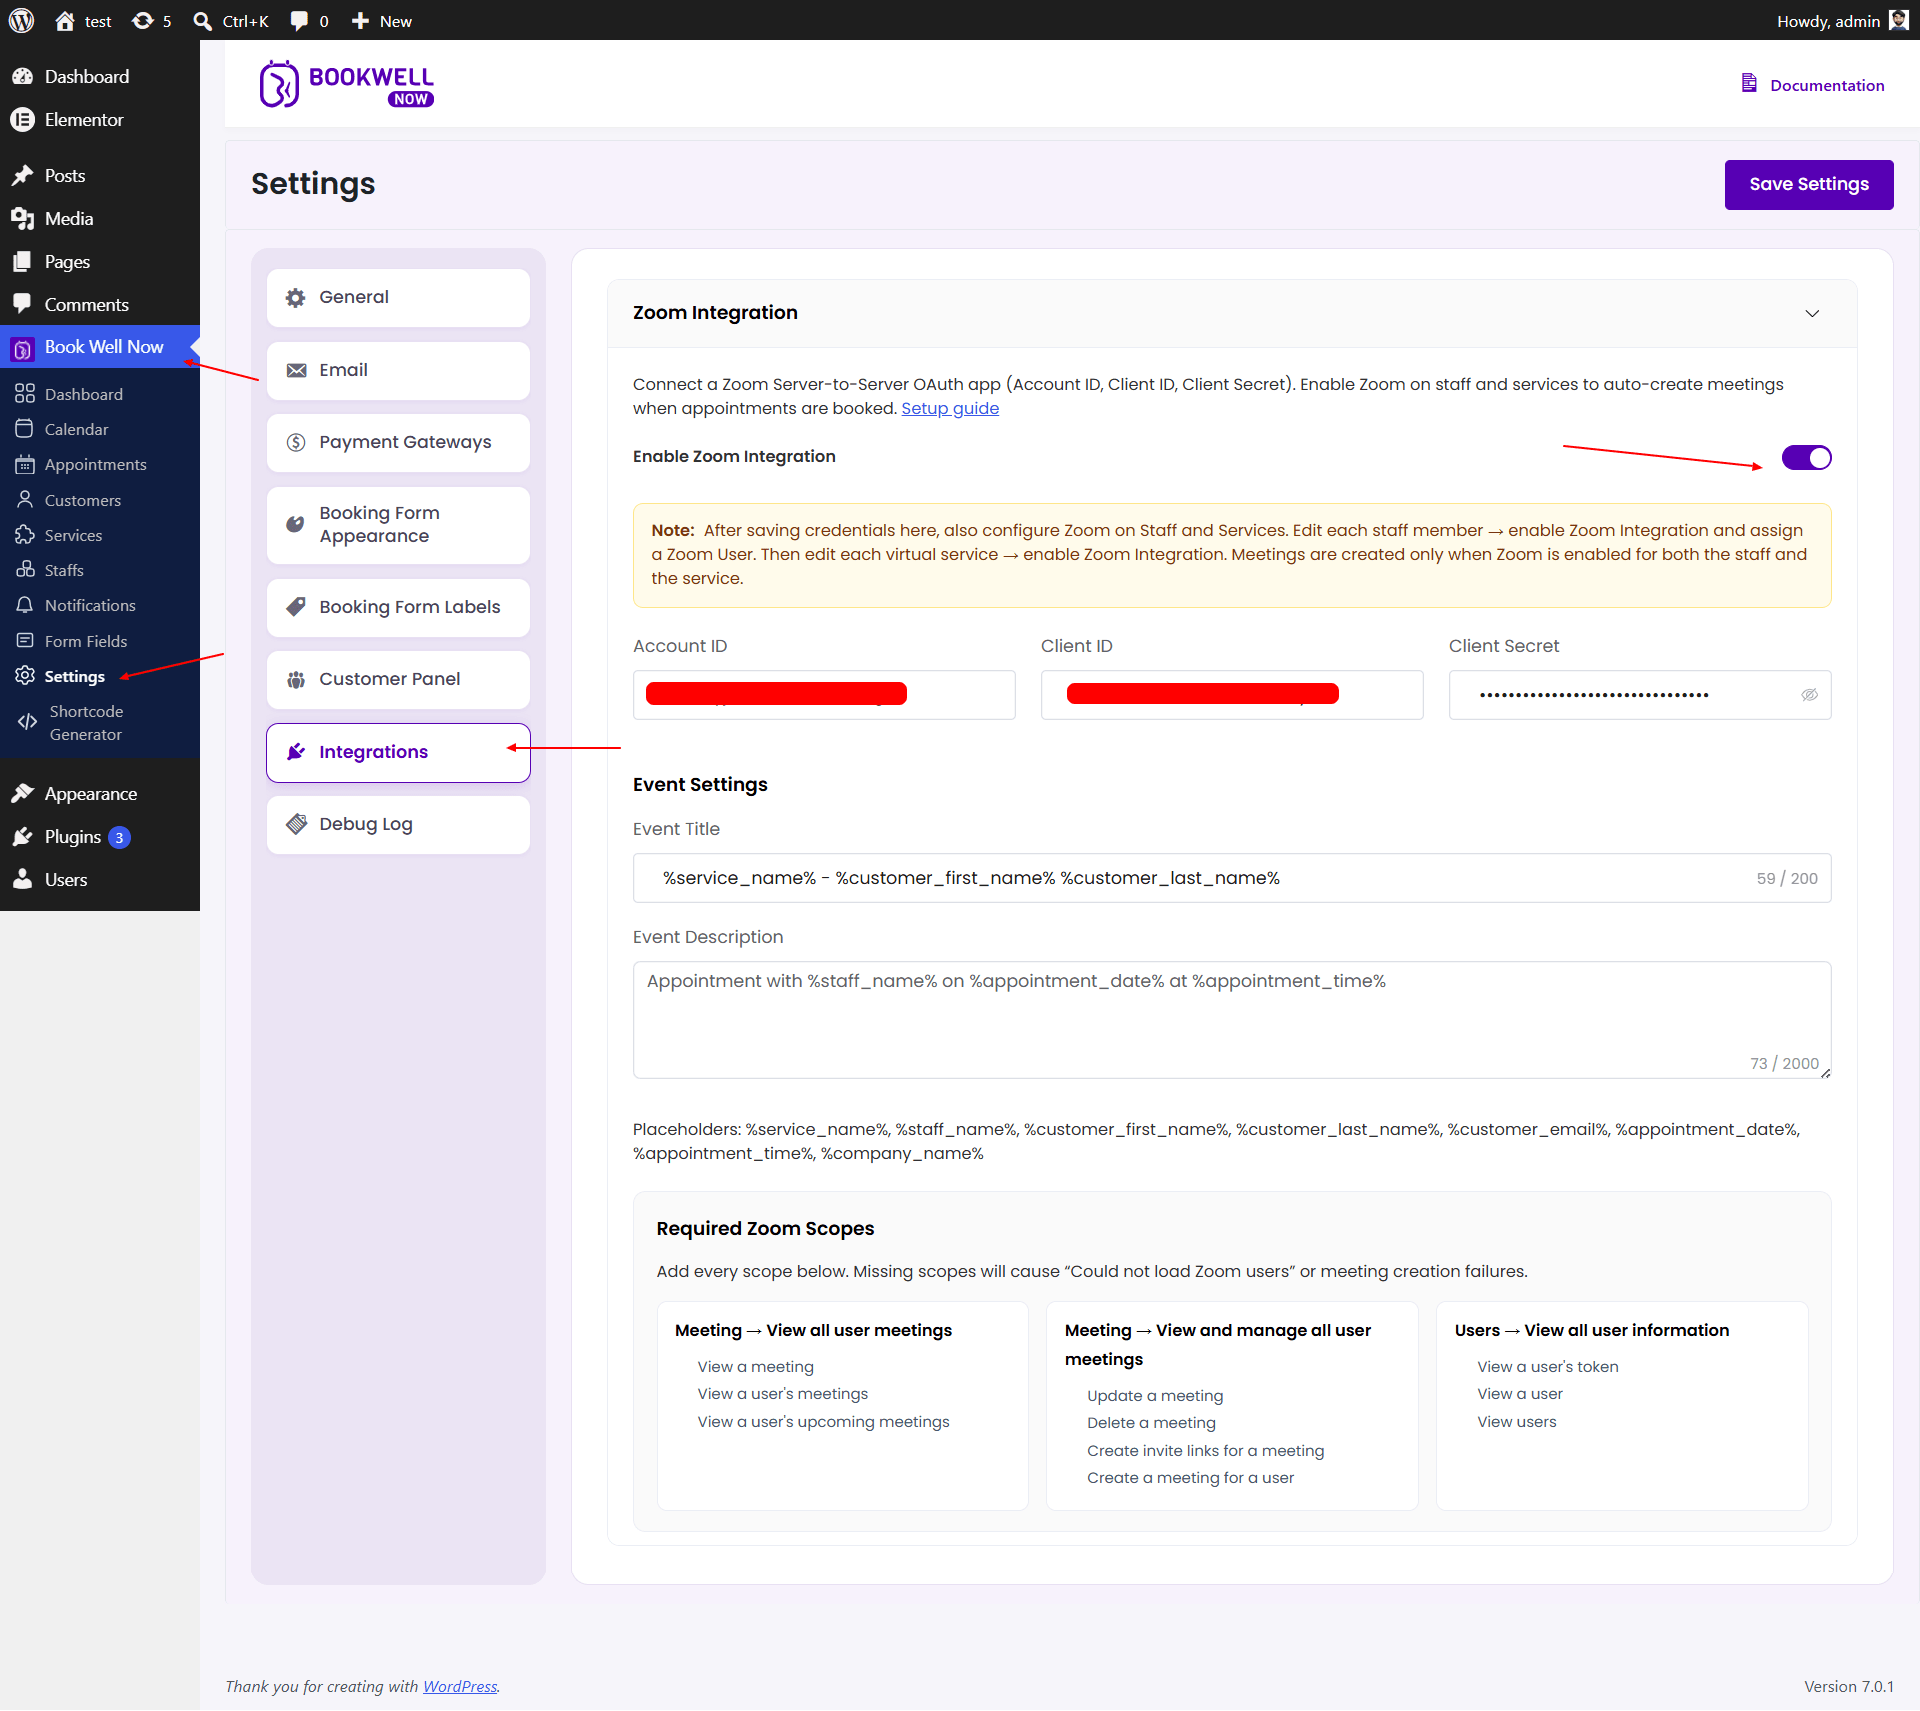
Configuring Zoom inside BookWellNow
Step 10: Enable Integration in Settings
Go back to your WordPress Dashboard and navigate to Book Well Now -> Settings -> Integrations. Toggle on Enable Zoom Integration. Make sure you have pasted your Account ID, Client ID, and Client Secret from Step 5. Click the Save Settings button in the top right.
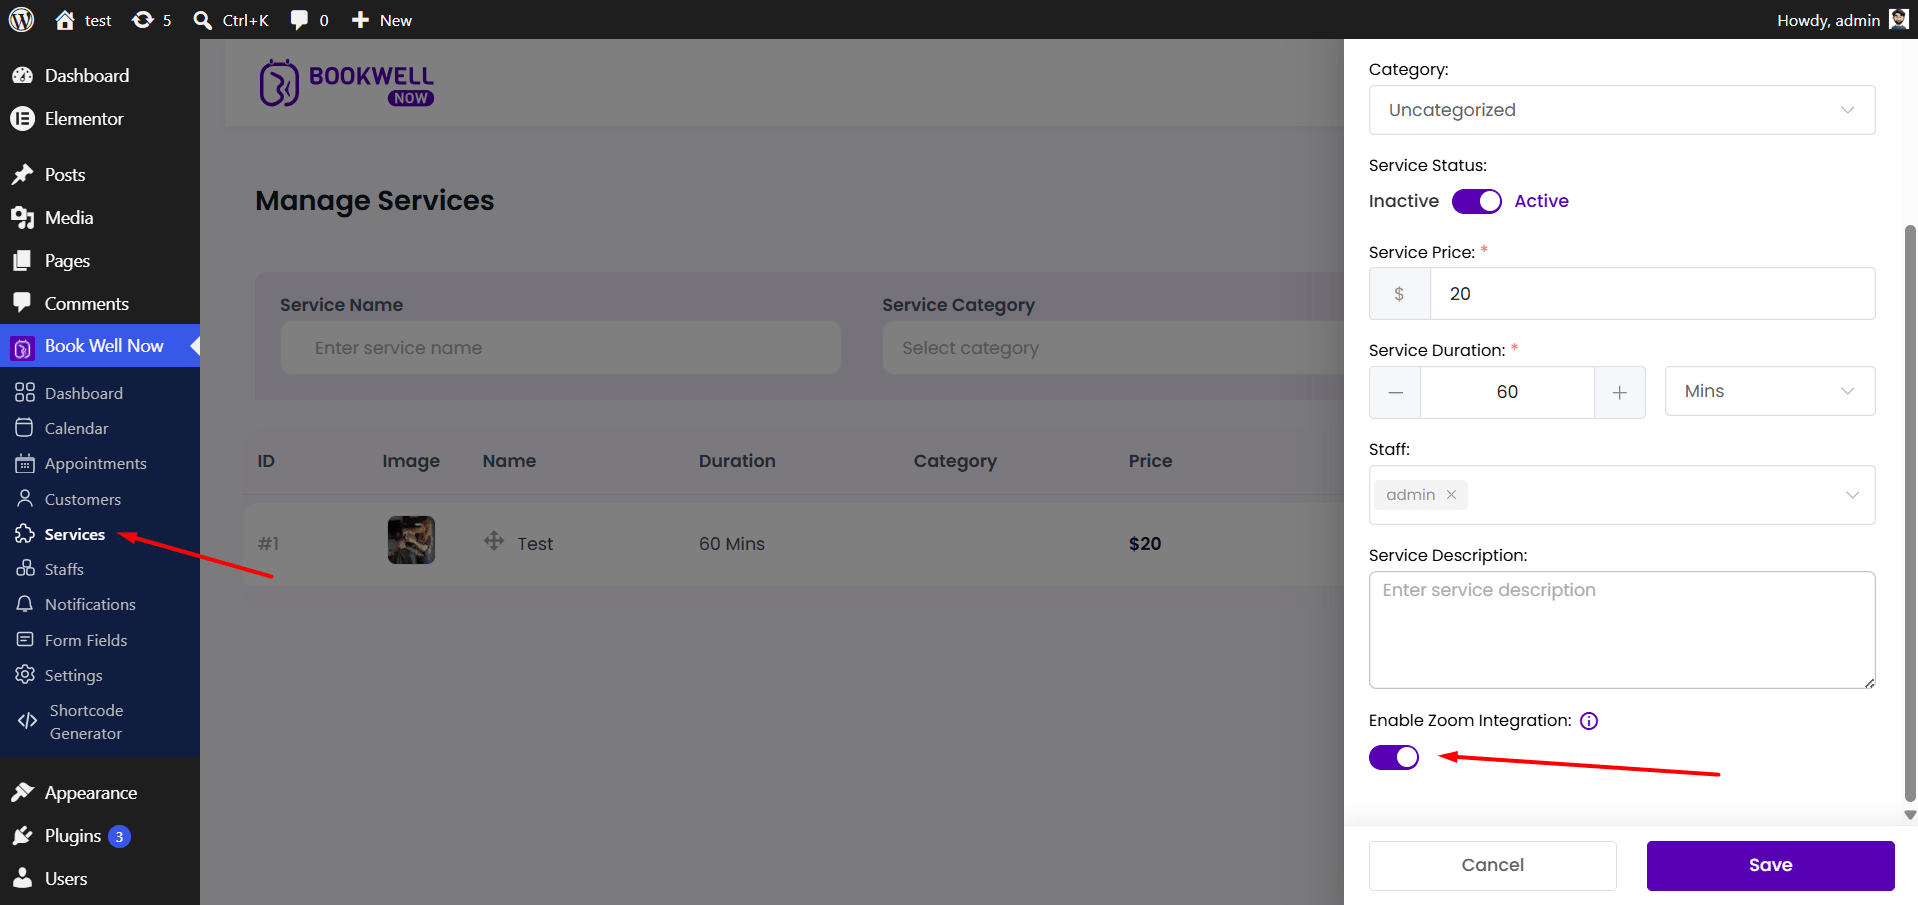
Step 11: Enable Zoom for Services
To automatically generate Zoom links, you must enable Zoom for specific services. Navigate to Book Well Now -> Services. Edit a service, scroll to the bottom of the right-hand panel, and toggle on Enable Zoom Integration. Click Save.
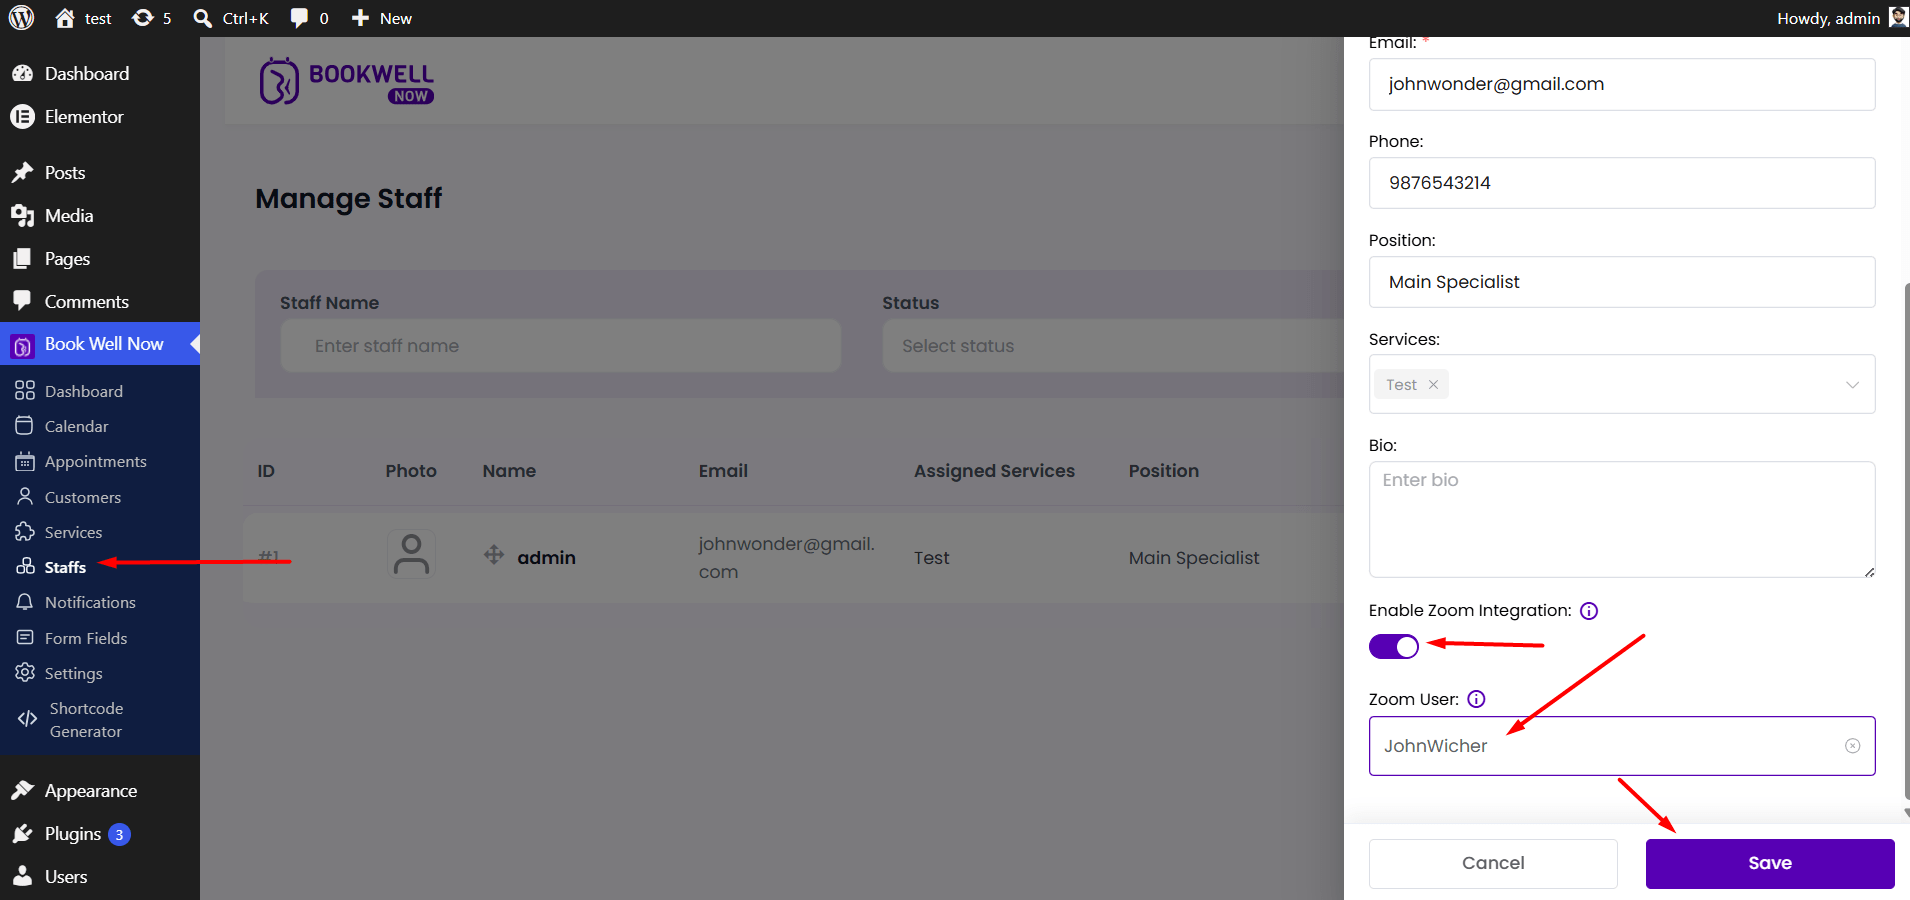
Step 12: Connect Staff to Zoom Accounts
You must also link your staff members to their corresponding Zoom accounts. Navigate to Book Well Now -> Staffs. Edit a staff member, toggle on Enable Zoom Integration, and select their specific account from the Zoom User dropdown menu. Click Save.
Step 13: View Zoom Meetings in Appointments
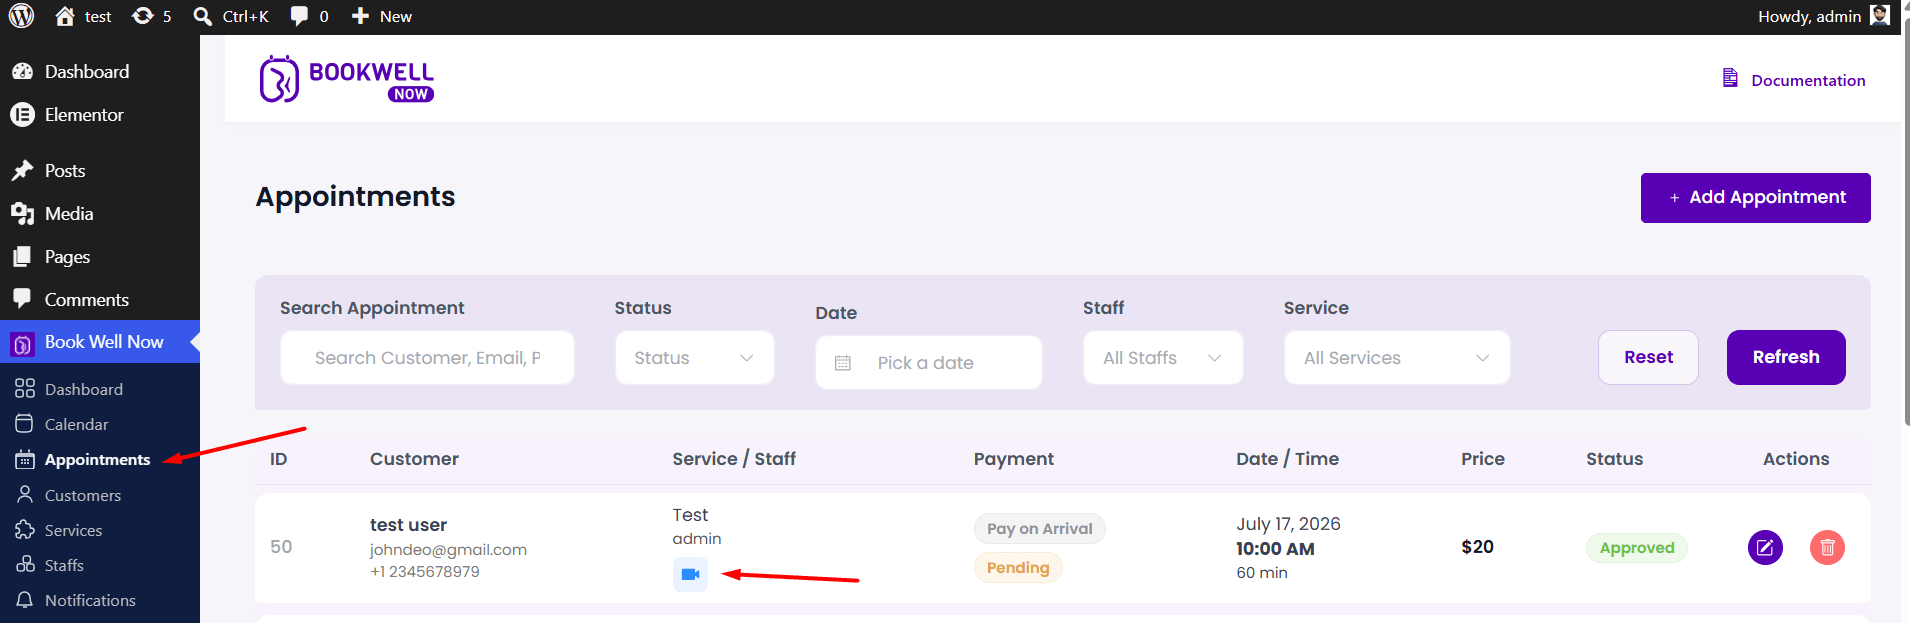
When a customer books an appointment for a Zoom-enabled service with a Zoom-enabled staff member, a unique Zoom meeting will automatically be created. You can verify this in Book Well Now -> Appointments, where a small blue video camera icon will appear under the Service / Staff column.
Step 14: Add Zoom Links to Email Notifications
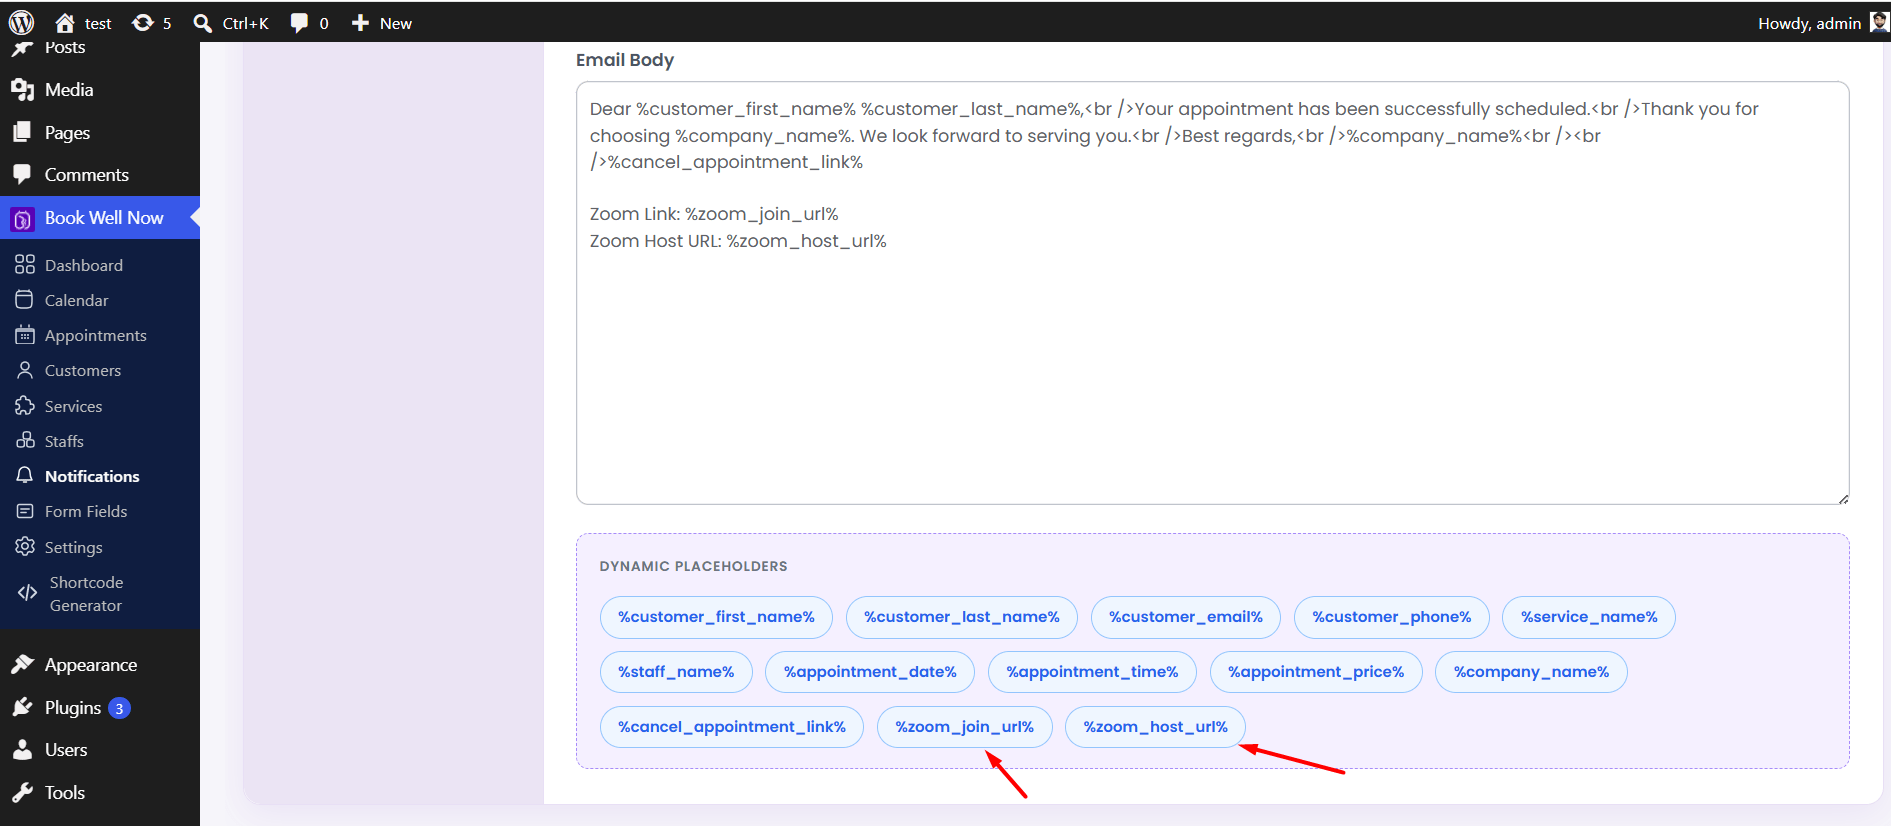
To send the generated Zoom links to your customers and staff, navigate to Book Well Now -> Notifications. Inside your Email Body templates, you can now use the new dynamic placeholders:
%zoom_join_url%(The link for the customer to join)%zoom_host_url%(The link for the staff to start the meeting)
Step 15: Customers Can Join via Customer Panel
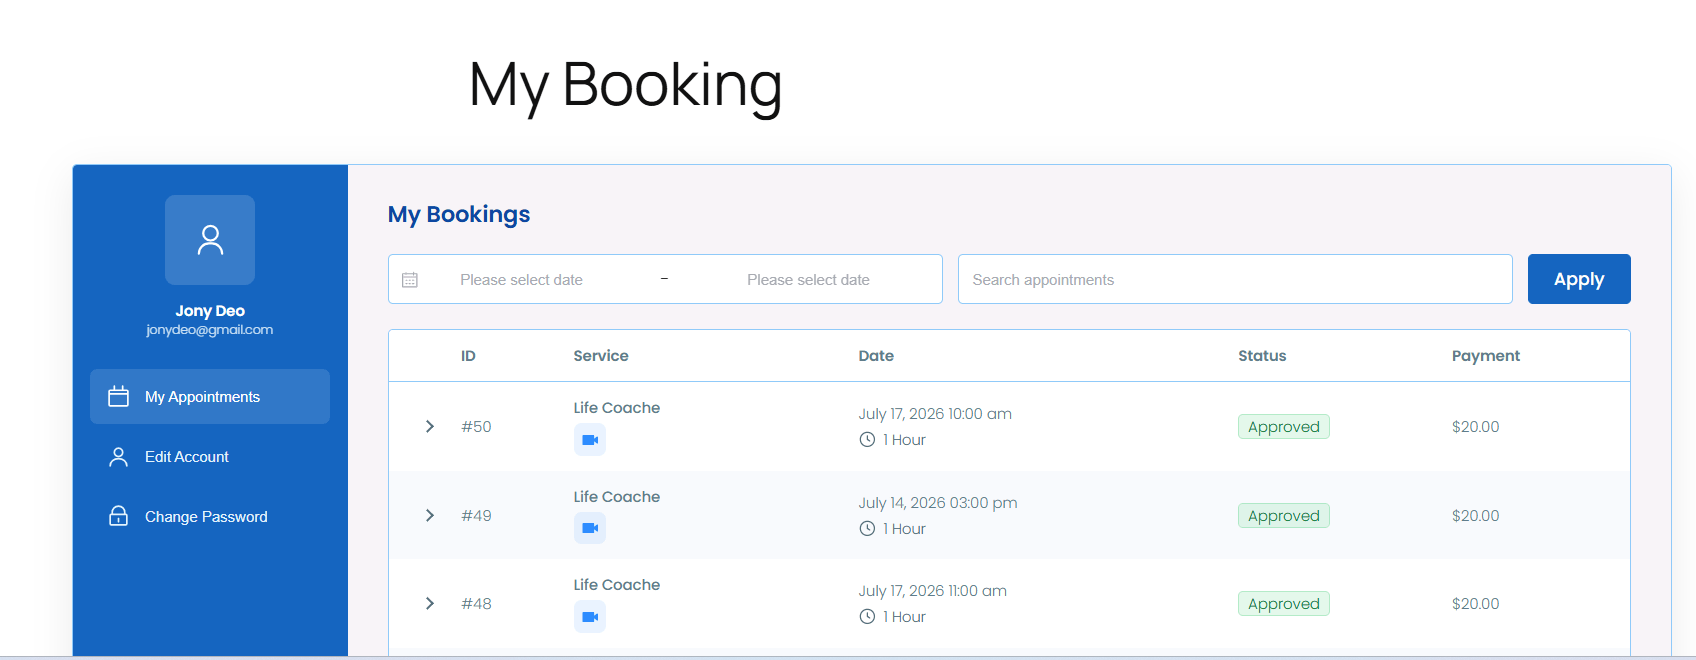
Your customers can also easily access their Zoom meeting links directly from their Customer Panel! When they log in and view their My Appointments tab, any appointment with an active Zoom meeting will display a blue video camera icon underneath the Service name. They can click this icon to launch their Zoom meeting.