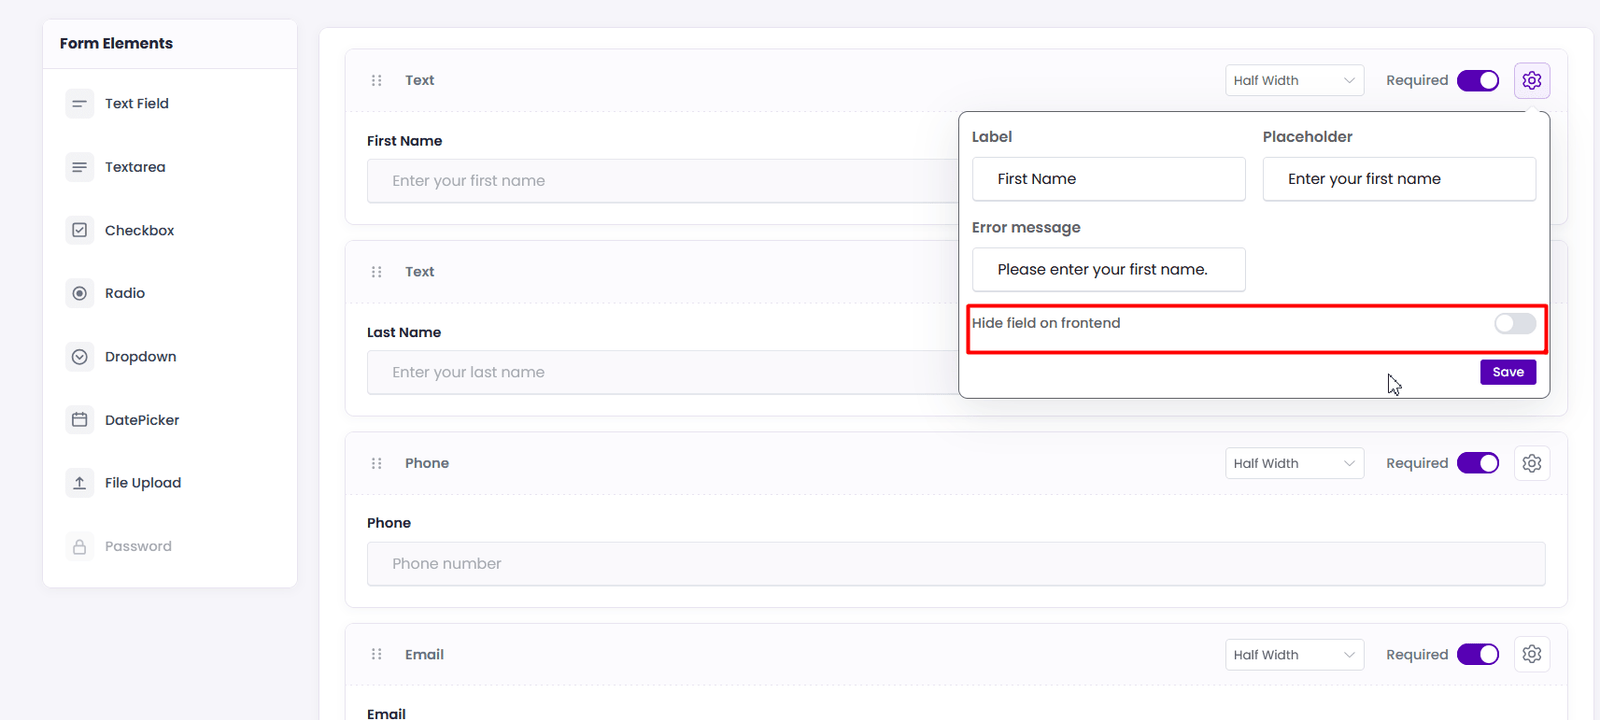
Customize Custom Fields
BookWellNow allows you to customize the customer details fields displayed on your booking form. You can add different form elements, configure individual field settings, control field width, and choose whether a field is required or optional.
This flexibility helps you collect the information your business needs while keeping the booking form clear, organized, and easy for customers to complete.
How to Manage Custom Fields
To customize your booking form fields, navigate to:
BookWellNow → Form Fields
The Form Fields page provides an easy-to-use form builder where you can manage the customer information collected during the booking process.
You can:
- Add new form elements
- Customize existing fields
- Change field labels and placeholders
- Set fields as required or optional
- Choose half-width or full-width layouts
- Configure individual field settings
- Organize fields to create a better booking experience
After making the required changes, click Save Changes to apply your customized form settings.
Configure Field Width
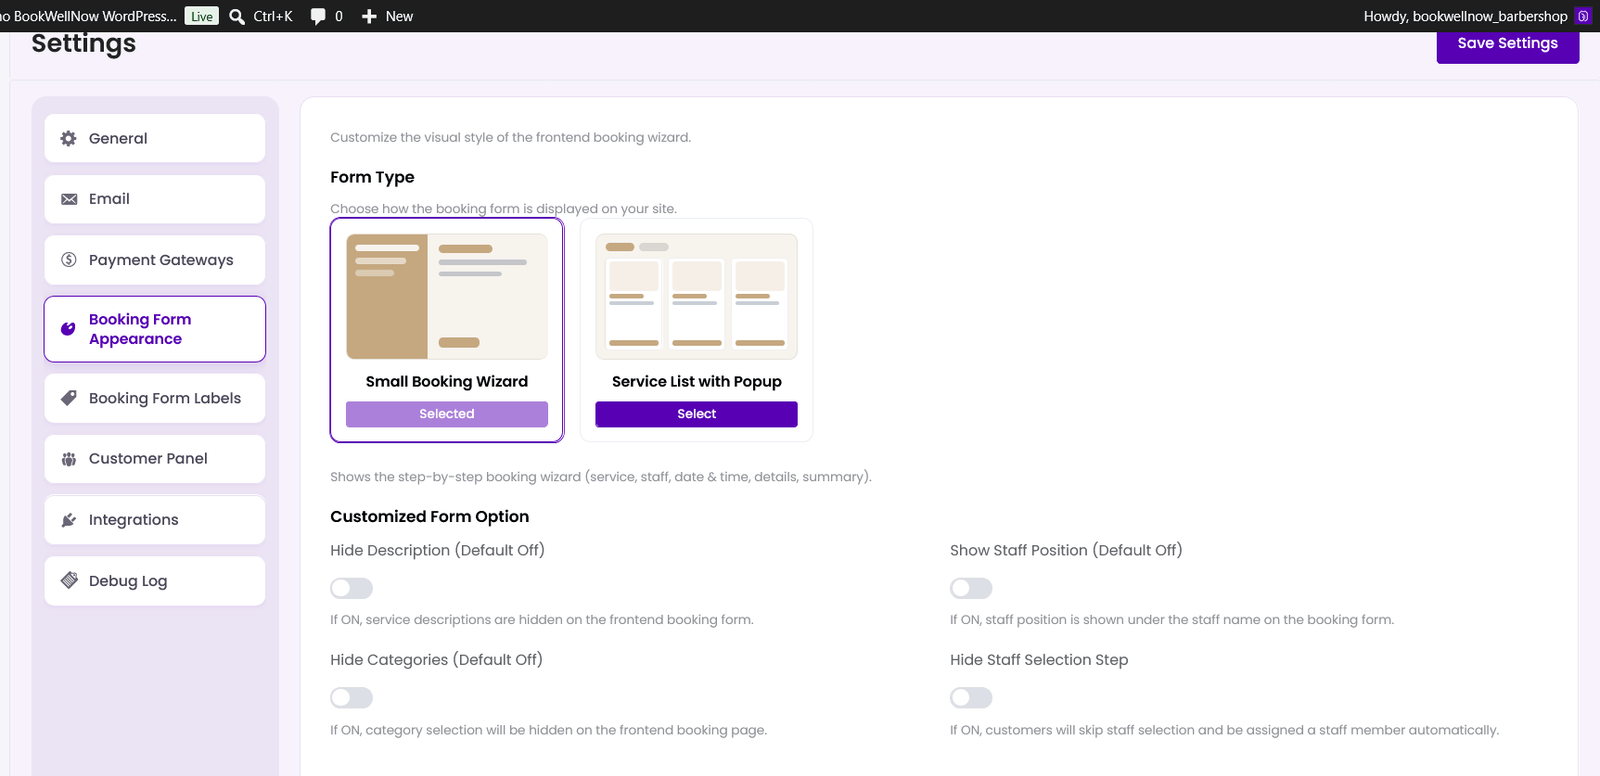
BookWellNow allows you to control the width of each custom field in the booking form. You can choose between Full Width and Half Width based on the type of information you want to collect.
Full Width
Select Full Width when you want the field to use the complete available width of the booking form.
This option is useful for fields that require more space, such as:
- Notes
- Customer messages
- Special requests
- Long text fields
- Terms and conditions
A full-width field is displayed on its own row, providing customers with a larger and more comfortable input area.
Half Width
Select Half Width when you want the field to use half of the available form width.
This option allows two fields to be displayed side by side, helping you create a compact and organized booking form.
For example:
First Name | Last Name
Half-width fields are useful for short customer information such as names, phone numbers, and other small input fields.
Set a Field as Required
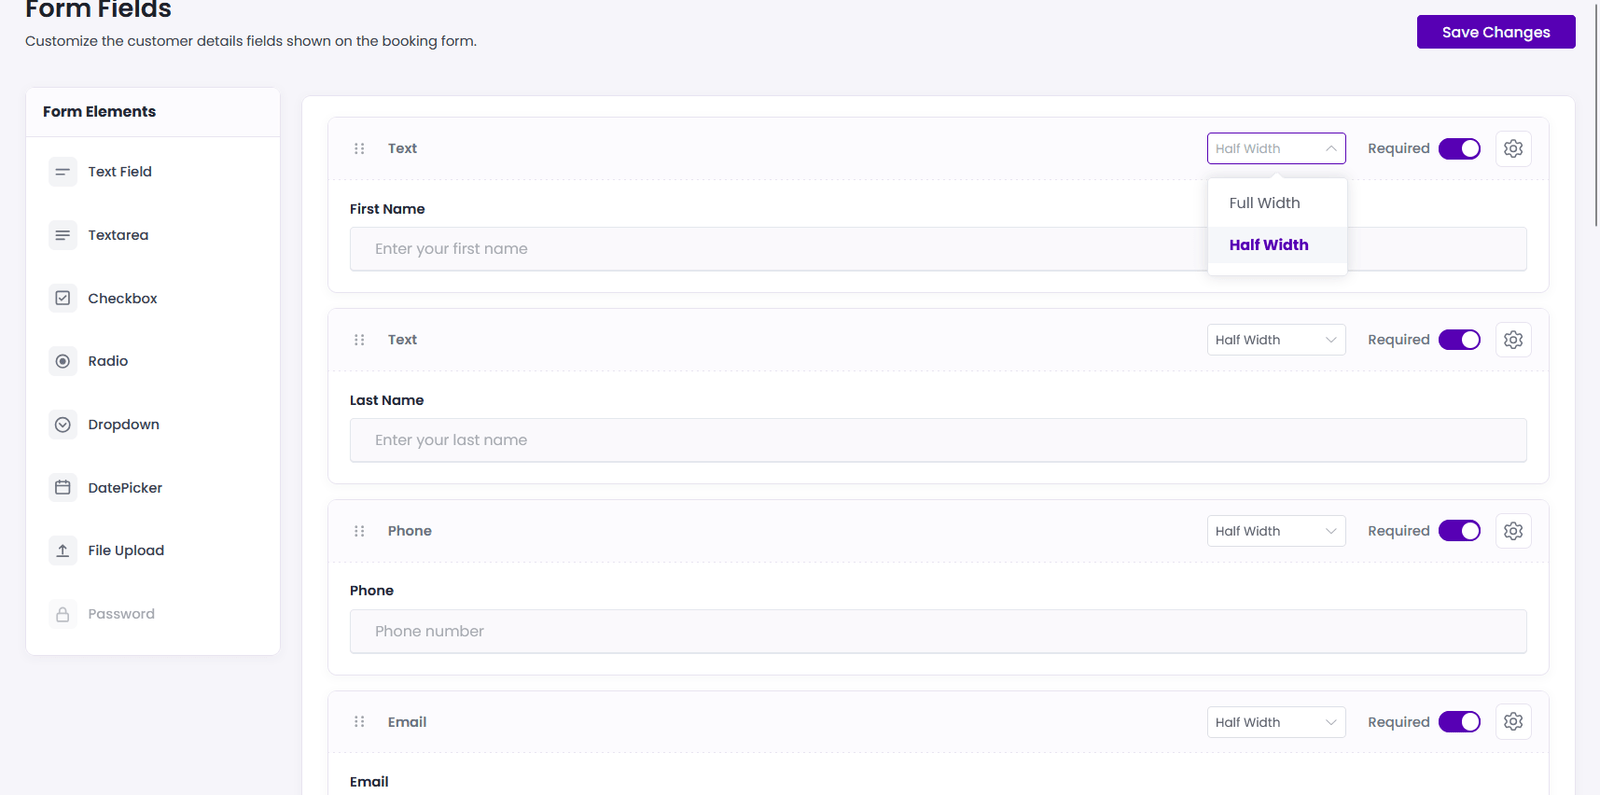
Use the Required toggle to control whether customers must complete a field before submitting or continuing with their booking.
- Required Enabled — Customers must enter or select the required information before they can continue.
- Required Disabled — The field becomes optional, and customers can leave it empty.
For example, fields such as First Name, Last Name, Phone Number, and Email Address can be marked as required to ensure that essential customer information is collected.
Customize the Field Label
The Label option allows you to define the name displayed above the input field.
A clear label helps customers understand what information they need to provide.
For example:
- First Name
- Last Name
- Phone Number
- Email Address
- Additional Notes
You can change the label according to your business requirements and the information you want to collect.
Add Placeholder Text
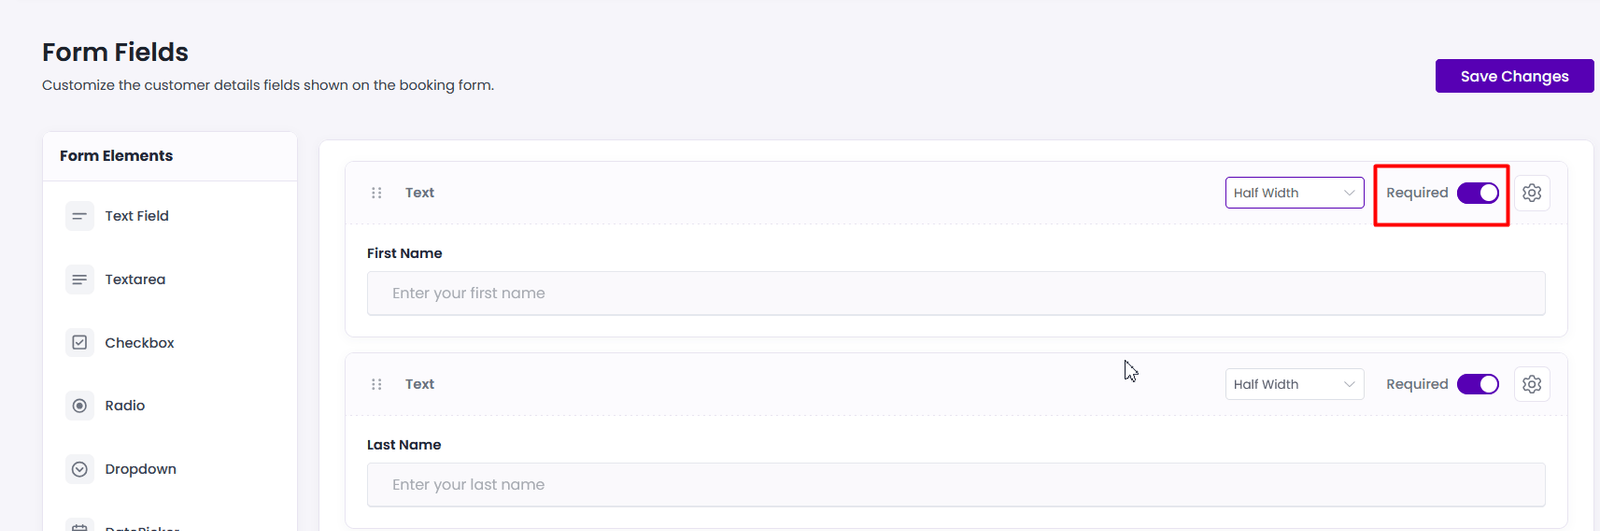
The Placeholder option allows you to display helpful text inside the input field before the customer enters any information.
Placeholder text can provide an example or guide customers on what they should enter.
The placeholder text disappears automatically when the customer starts entering information.
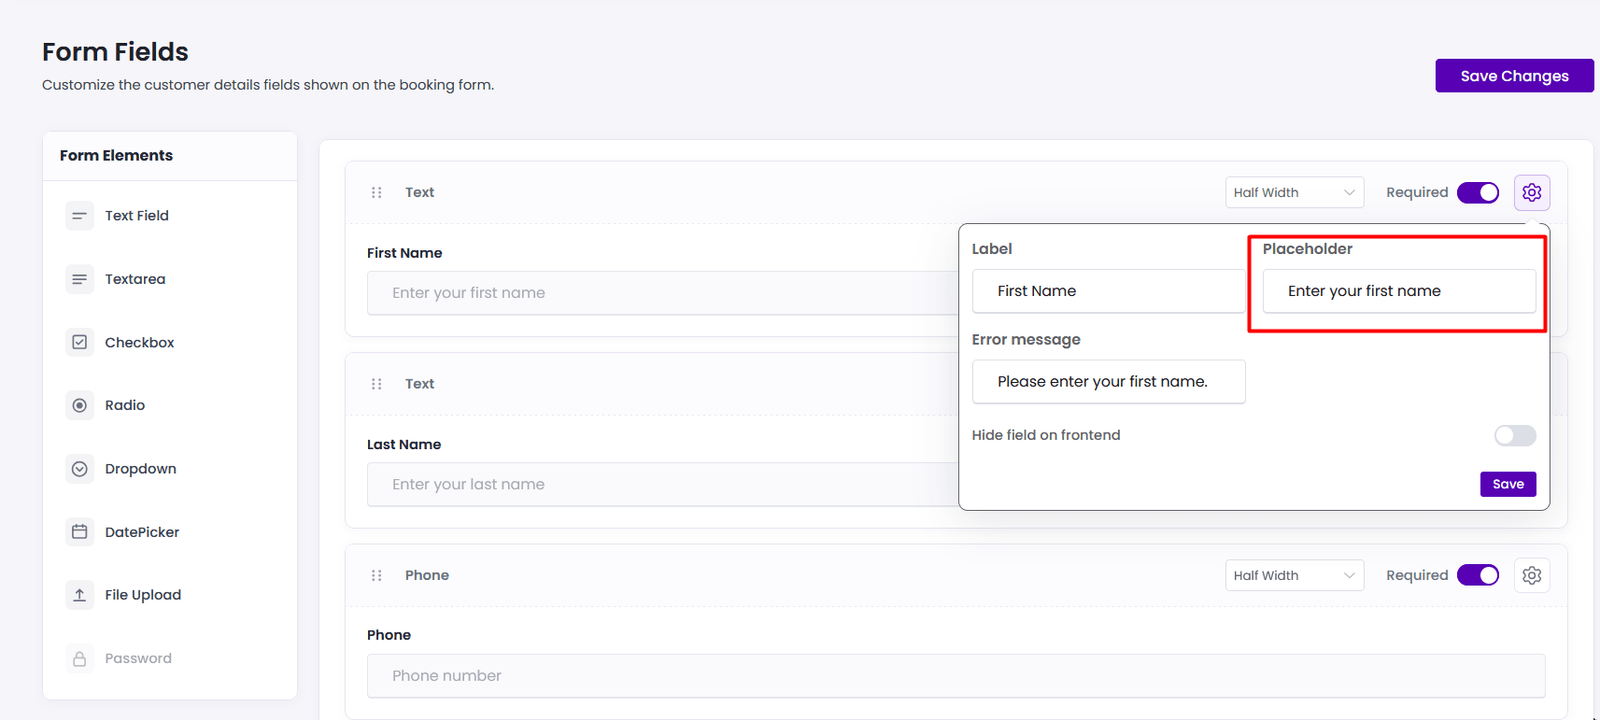
Add a Custom Error Message
The Error Message option allows you to create a custom validation message that is displayed when a required field is not completed correctly.
For example, for the First Name field, you can use:
Please enter your first name.
Custom error messages make it easier for customers to understand what information is missing and how to correct the issue.
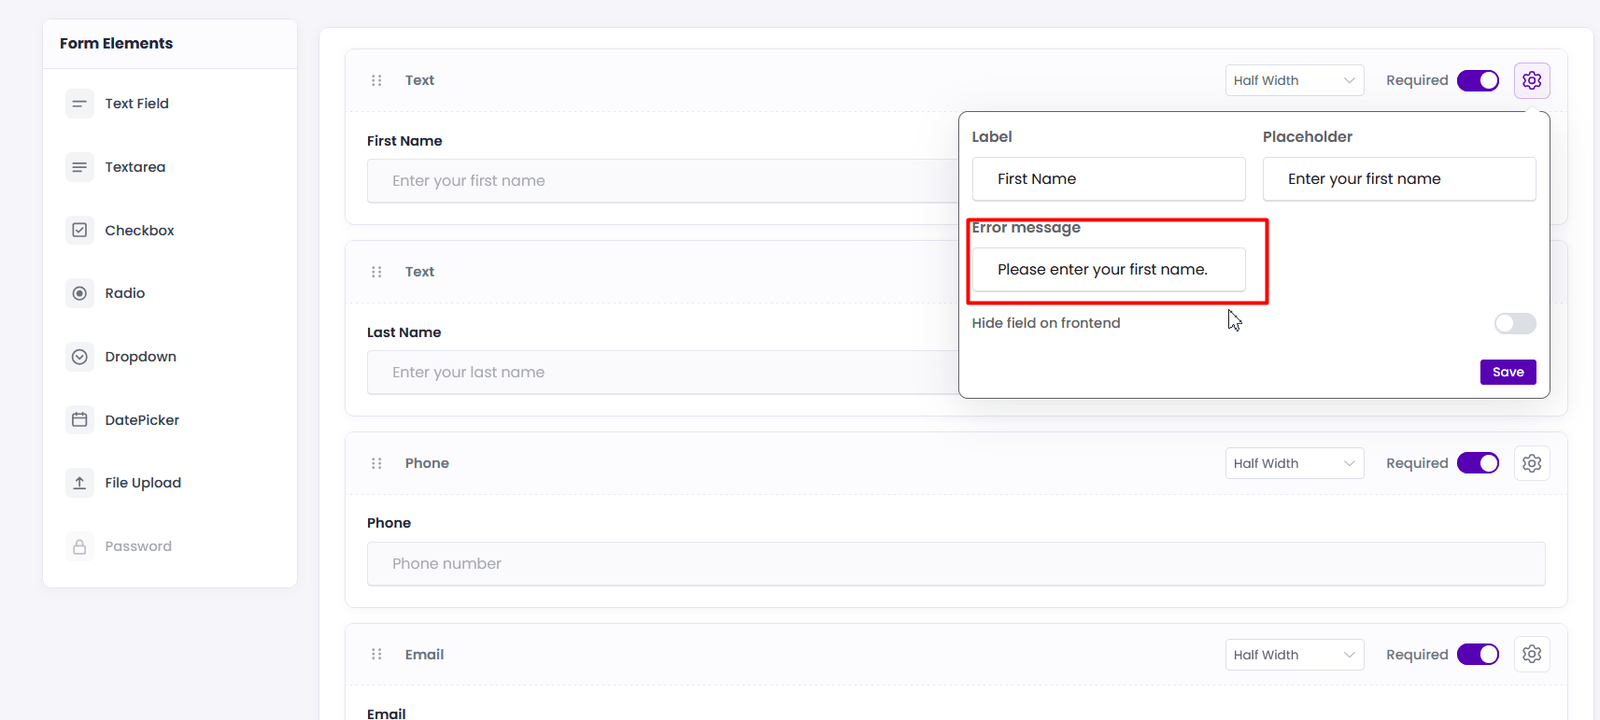
Hide Field on Frontend
Use the Hide field on frontend toggle to control whether a field is displayed to customers on the booking form.
- Toggle Disabled — The field is visible on the customer-facing booking form.
- Toggle Enabled — The field is hidden from customers on the frontend.
This option is useful when you want to keep a field in the form configuration but temporarily prevent it from appearing during the booking process.
Save Field Settings
After updating the Label, Placeholder, Error Message, Field Width, Required status, or Frontend Visibility, click the Save button to apply the changes to the selected field.
After configuring all required fields, click Save Changes to save the complete custom form configuration.