Service Extra Rules
Service Extra Rules allow you to associate specific extras with specific services and define selection limits (e.g. making certain extras mandatory, or limiting the minimum/maximum number of add-ons a client can select for a given service).
Step 1: Access the Service Extra Rules Panel
Log in to your WordPress dashboard and navigate to:
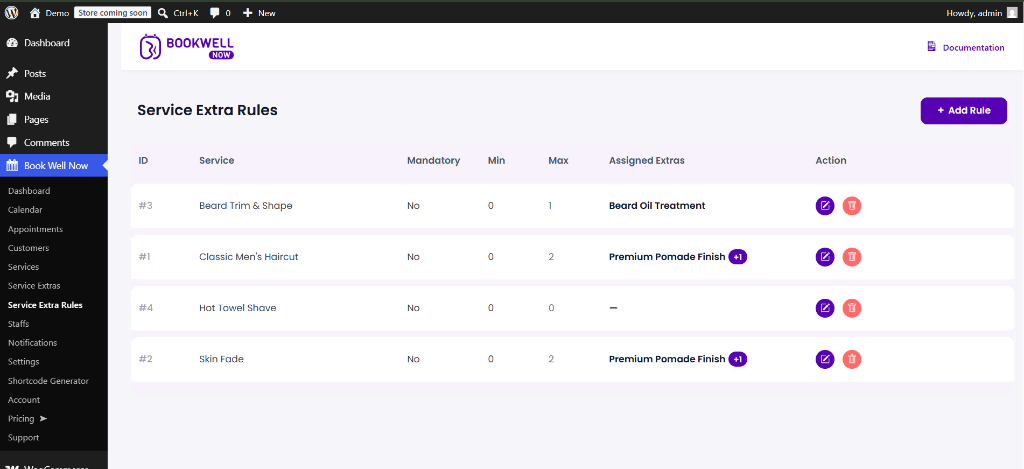
BookWellNow → Service Extra RulesThis screen displays all defined rules. The table details which service is targeted, whether extras are mandatory, selection range limits (Min/Max), assigned extras, and administrative action buttons.
Step 2: Add a New Service Extra Rule
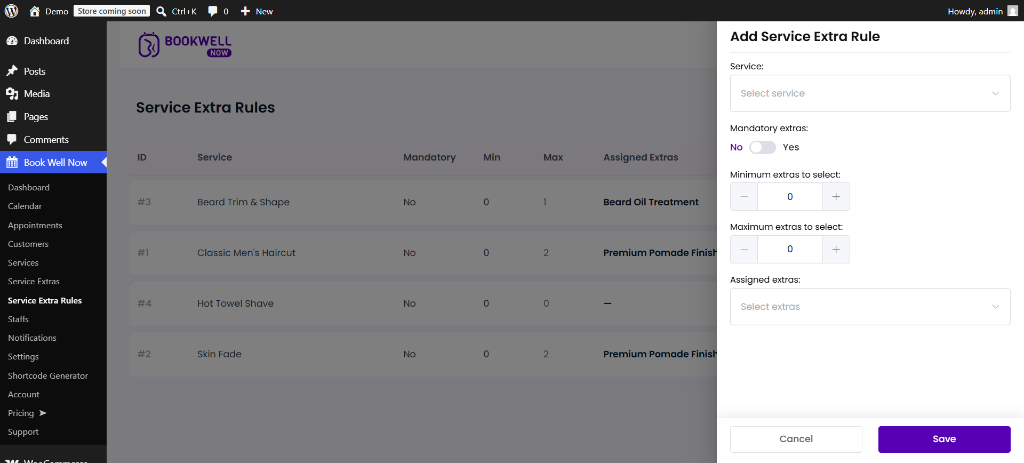
To define a new extra selection rule, click the primary purple + Add Rule button in the top-right corner. A sliding drawer panel will open from the right side of the screen:
- Service: Select the target service from the dropdown (e.g. “Classic Men’s Haircut”).
- Mandatory extras: Toggle between No and Yes. If set to Yes, customers will be forced to pick at least one extra during checkout.
- Minimum extras to select: Set the minimum count of extras required (default is
0). - Maximum extras to select: Define the maximum number of extras a client can select for this service.
- Assigned extras: Choose one or more configured extras from the multi-select dropdown that should be linked to the service.
💡 Rule Configuration Tip: Setting maximum extras (e.g. 2) prevents customers from overloading an appointment with too many time-consuming add-ons.
Step 3: Edit or Delete Extra Rules
Manage your rules list easily using the action column controls:
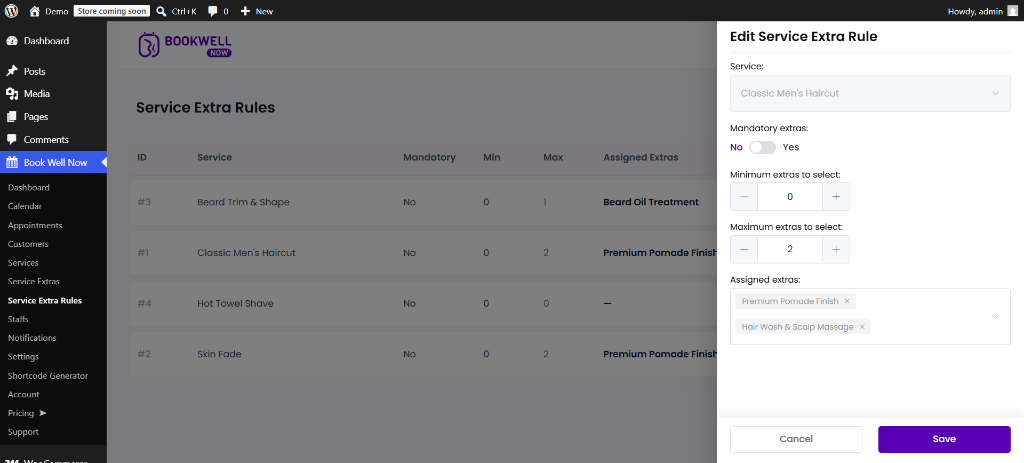
- Edit Rule: Click the purple Edit button (pencil icon) to open the edit drawer panel, alter rules, add/remove assigned extras, and save changes.
- Delete Rule: Click the red Trash button to delete the rule configuration permanently. Removing a rule does not delete the underlying services or extras themselves.