Notifications
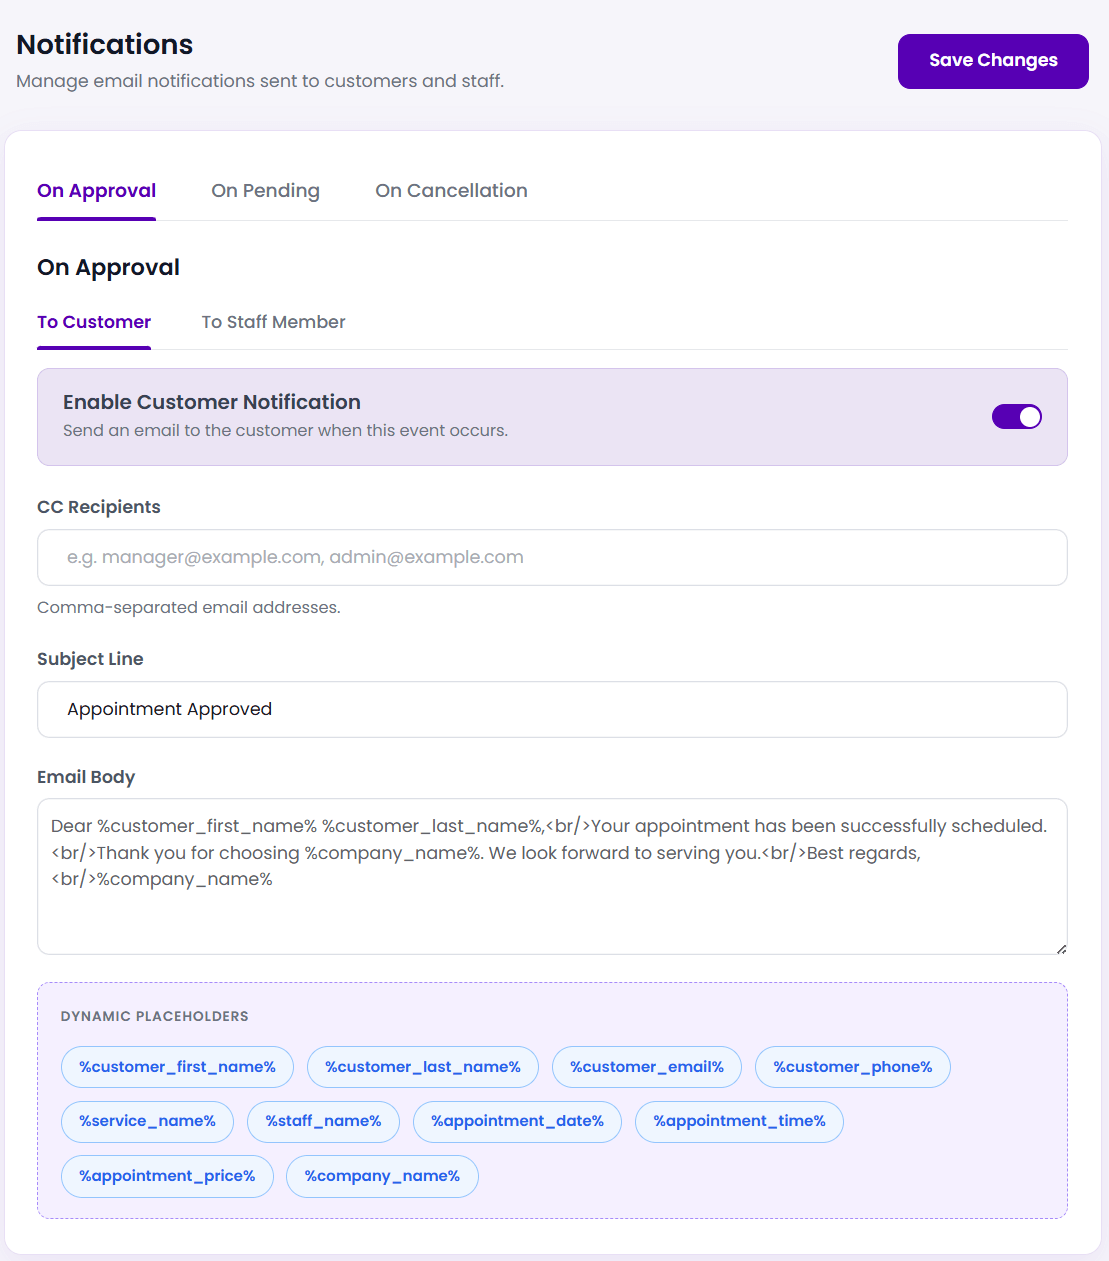
Automated transactional alerts keep your business organized, reduce scheduling conflicts, and eliminate client no-shows. The Notifications settings panel in BookWellNow provides an elegant system for managing automated email confirmations, status updates, and cancellation alerts sent to both customers and staff members.
ℹ Quick Overview: Every email template in BookWellNow can be configured independently, allowing you to tailor distinct subject lines, CC recipients, and personalized content bodies for clients and staff.
Step 1: Access the Notifications Panel
To access and modify email notification templates, log into your WordPress admin panel and navigate to:
BookWellNow → NotificationsThe interface divides notifications into three primary trigger events (tabs) and two distinct target audiences (sub-tabs).
Step 2: Understand Trigger Events & Target Audiences
BookWellNow organizes automated notifications into three core appointment status transitions:
| Event Trigger | System Condition | To Customer (Sub-tab) | To Staff Member (Sub-tab) |
|---|---|---|---|
| On Approval | Fires when a booking is confirmed (approved). | Sends confirmation with receipt and appointment details. | Alerts the specialist of a new scheduled booking. |
| On Pending | Fires when a booking requires manual review. | Notifies the client their request has been received. | Alerts the specialist they have a booking request awaiting approval. |
| On Cancellation | Fires when an appointment is cancelled. | Confirms the cancellation and provides refund or reschedule information. | Alerts the specialist to free up their calendar schedule. |
For each event trigger, configure the corresponding recipient sub-tab (To Customer or To Staff Member) to customize that specific notification flow.
Step 3: Configure Template Settings & CC Mappings
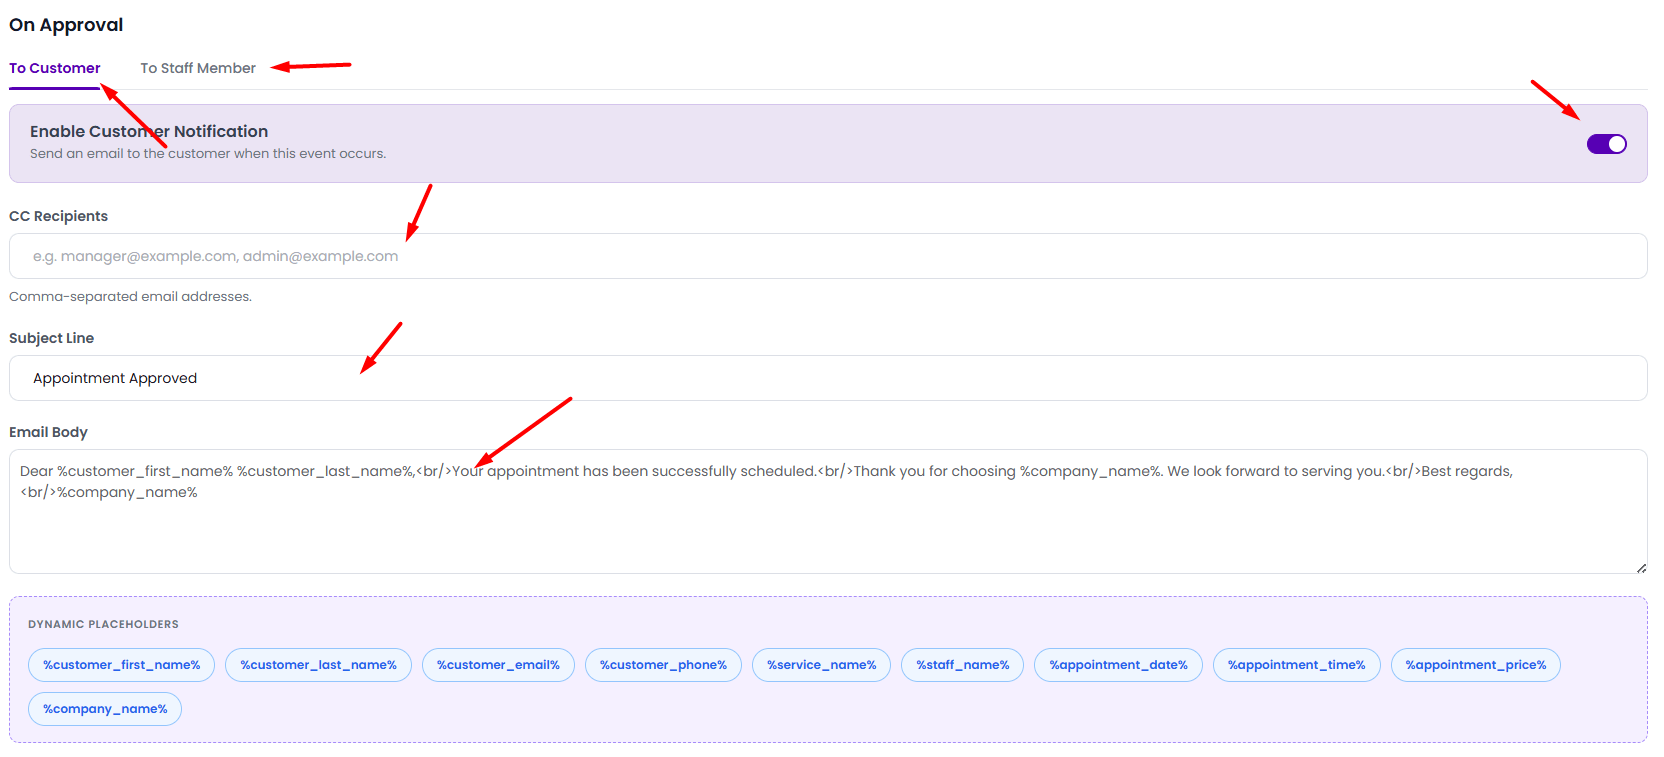
Every alert template features four key parameters to manage delivery and routing:
- Enable Notification (Slide Switch): Toggle the purple slide switch in the template card to enable or disable the specific alert. Gray indicates the alert is inactive.
- CC Recipients: Add extra email addresses (e.g.
manager@example.com, admin@example.com) separated by commas to copy managers or administrators on bookings. - Subject Line: Write a custom subject line. You can include dynamic placeholders in this field (e.g. “Appointment Confirmed: %service_name%”).
- Email Body: A rich text editor that supports standard HTML markup (such as line breaks
<br/>) and dynamic placeholders to customize the message.
Step 4: Master Dynamic Placeholders
Dynamic placeholders act as smart variables, automatically pulling real appointment details from your database before dispatching emails. BookWellNow supports ten core placeholders:
| Dynamic Placeholder | Data Field Retrieved | Example Rendered Value |
|---|---|---|
%customer_first_name% |
Client’s first name | Jone |
%customer_last_name% |
Client’s last name | Deo |
%customer_email% |
Client’s email address | jonedeo@mail.com |
%customer_phone% |
Client’s contact number | +1 65784578 |
%service_name% |
Name of the booked service | Hair Cut |
%staff_name% |
Assigned specialist’s name | Jone Deo |
%appointment_date% |
Date of the appointment | May 29, 2026 |
%appointment_time% |
Confirmed booking time slot | 11:00 AM |
%appointment_price% |
Cost of the assigned service | $45.00 |
%company_name% |
Your business or company name | BookWell Now |
💡 Marketing Tip: Use the %customer_first_name% placeholder at the beginning of subjects and email bodies (e.g., “Hi %customer_first_name%, your appointment is confirmed!”) to increase open rates and build client engagement!
Step 5: Configure Cancellation Alerts for Staff Members
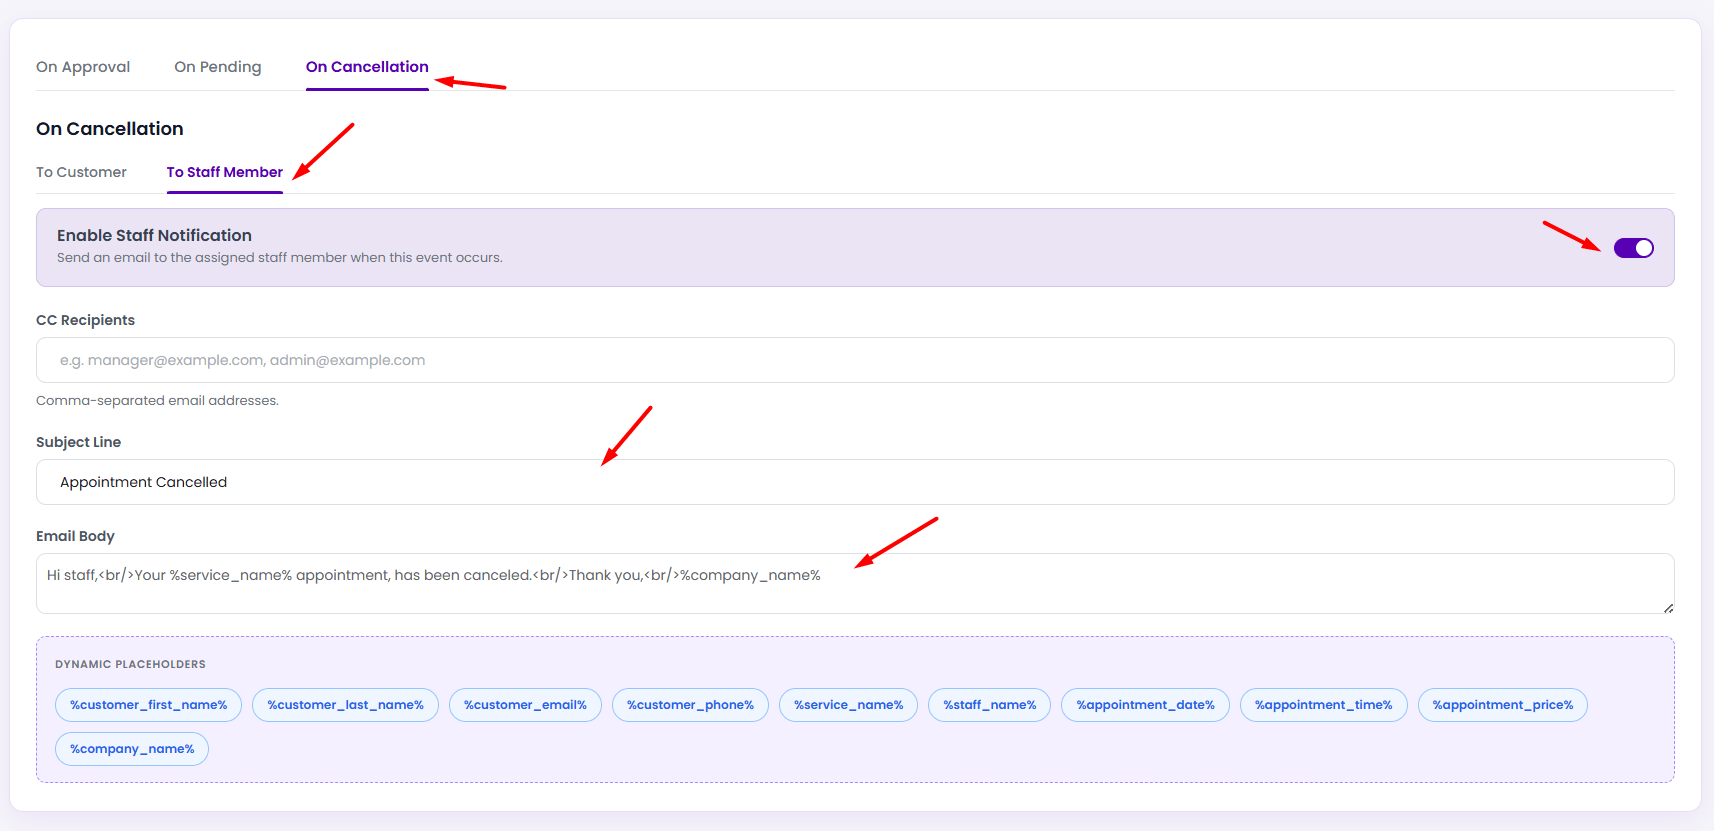
Configuring cancellation notifications for staff members ensures specialists are notified immediately when an appointment is canceled, freeing up their calendar for other bookings.
To configure the cancellation email sent to the assigned specialist:
- Navigate to the On Cancellation tab and select the To Staff Member sub-tab.
- Toggle the Enable Staff Notification slide switch to On (Purple).
- Set the Subject Line exactly to:
Appointment Cancelled - Input the following template in the Email Body textarea to notify the specialist:
Hi staff,<br/>Your %service_name% appointment, has been canceled.<br/>Thank you,<br/>%company_name%
⚠ Delivery Warning: Make sure to click the purple Save Changes button in the top-right corner after editing any tab or sub-tab. Leaving the page before saving will discard your changes!