Email Settings
The Email Settings tab manages the outbound transactional mail server, sender metadata, and deliverability test suites.
Step 1: Open Email Settings
Navigate to: BookWellNow → Settings and select the Email tab.
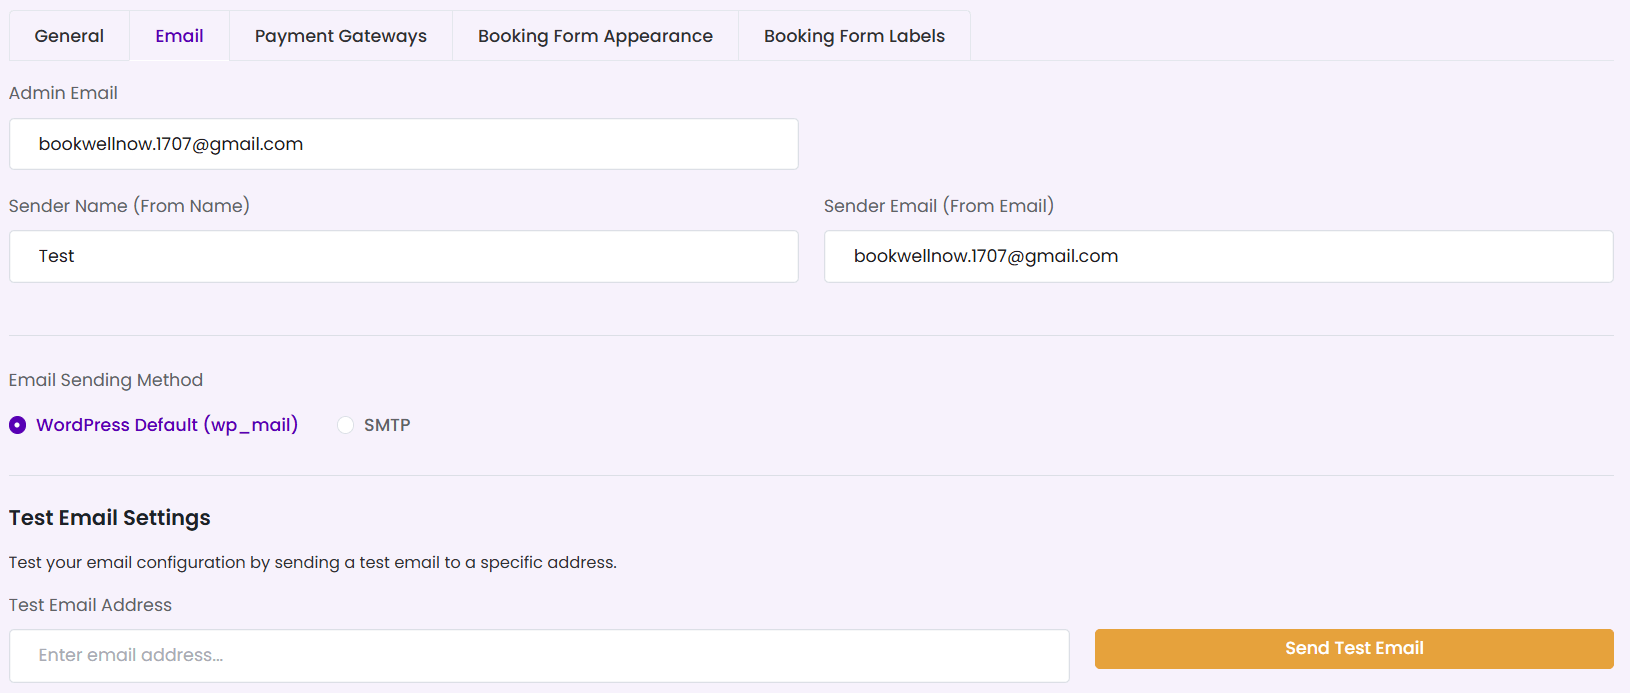
Step 2: Populate Sender Metadata
Configure the outbound sender identity details for transactional emails:
- Admin Email: Input the primary email address where system updates and booking alerts are sent.
- Sender Name (From Name): Specify the business or display name that recipients will see (e.g., “My Studio Support”).
- Sender Email (From Email): The address from which emails are dispatched (e.g., “bookings@mystudio.com”). Make sure this domain matches your SPF/DKIM records!
Step 3: Choose Email Sending Method
Select your outbound mail dispatch method to ensure reliable delivery:
- WordPress Default (wp_mail): Uses your local web host’s mail server. Easy to set up but highly susceptible to spam filters.
- SMTP: Routes emails through an external secure mail service (highly recommended!). Selecting SMTP opens fields to configure your mail host, port, credentials, and encryption settings.
Step 4: Test Mail Deliverability
Verify that your email server configuration is working correctly:
- Scroll down to the Test Email Settings card.
- Input a valid target inbox address in the Test Email Address field.
- Click the amber Send Test Email button.
- Check the inbox for the system verification message to confirm successful delivery.
💡 SMTP Tip: Web hosts often block local PHP mail delivery. We highly recommend configuring SMTP and using a dedicated mail provider (like SendGrid, Mailgun, or Postmark) to ensure client booking confirmations arrive reliably in their inbox!