Payment Gateway Settings
The Payment Gateways settings tab allows you to configure payment checkout options, PayPal, WooCommerce catalog integrations, metadata templates, and order status mapping rules.
Step 1: Open Payment Gateways Settings
Log in to your WordPress dashboard and navigate to:
BookWellNow → Settings → Payment GatewaysThe interface divides configurations into Offline Payment options, PayPal options, WooCommerce Payment options, and Order Status Sync Rules.
Step 2: Configure Offline Payments
Offline payments permit customers to request bookings without payment clearance. The balance is handled manually or in person:
- Disable / Enable: Toggle to Enable to display the offline checkout choice.
- Label: Input the public label displayed on your booking forms (e.g. “Pay on Arrival”).

Step 3: Configure PayPal Payments
Allow customers to pay for their bookings securely via PayPal:
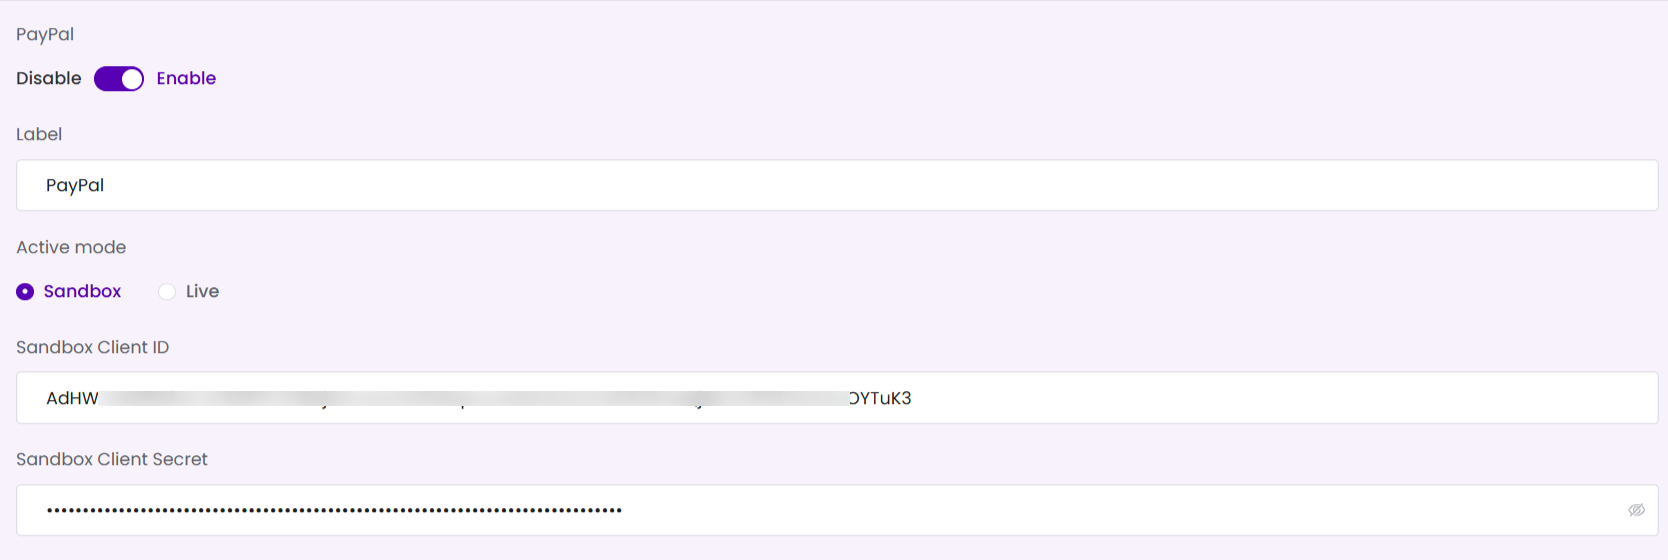
- Disable / Enable: Toggle to Enable to activate the PayPal payment gateway.
- Label: Input the public label displayed on your booking forms (e.g. “PayPal”).
- Active mode: Choose Sandbox for testing or Live for accepting real payments.
- Sandbox/Live Client ID: Enter your PayPal REST API Client ID corresponding to the selected mode.
- Sandbox/Live Client Secret: Enter your PayPal REST API Client Secret.
Step 4: Configure WooCommerce Payments
Seamlessly route transactions through WooCommerce checkout options:
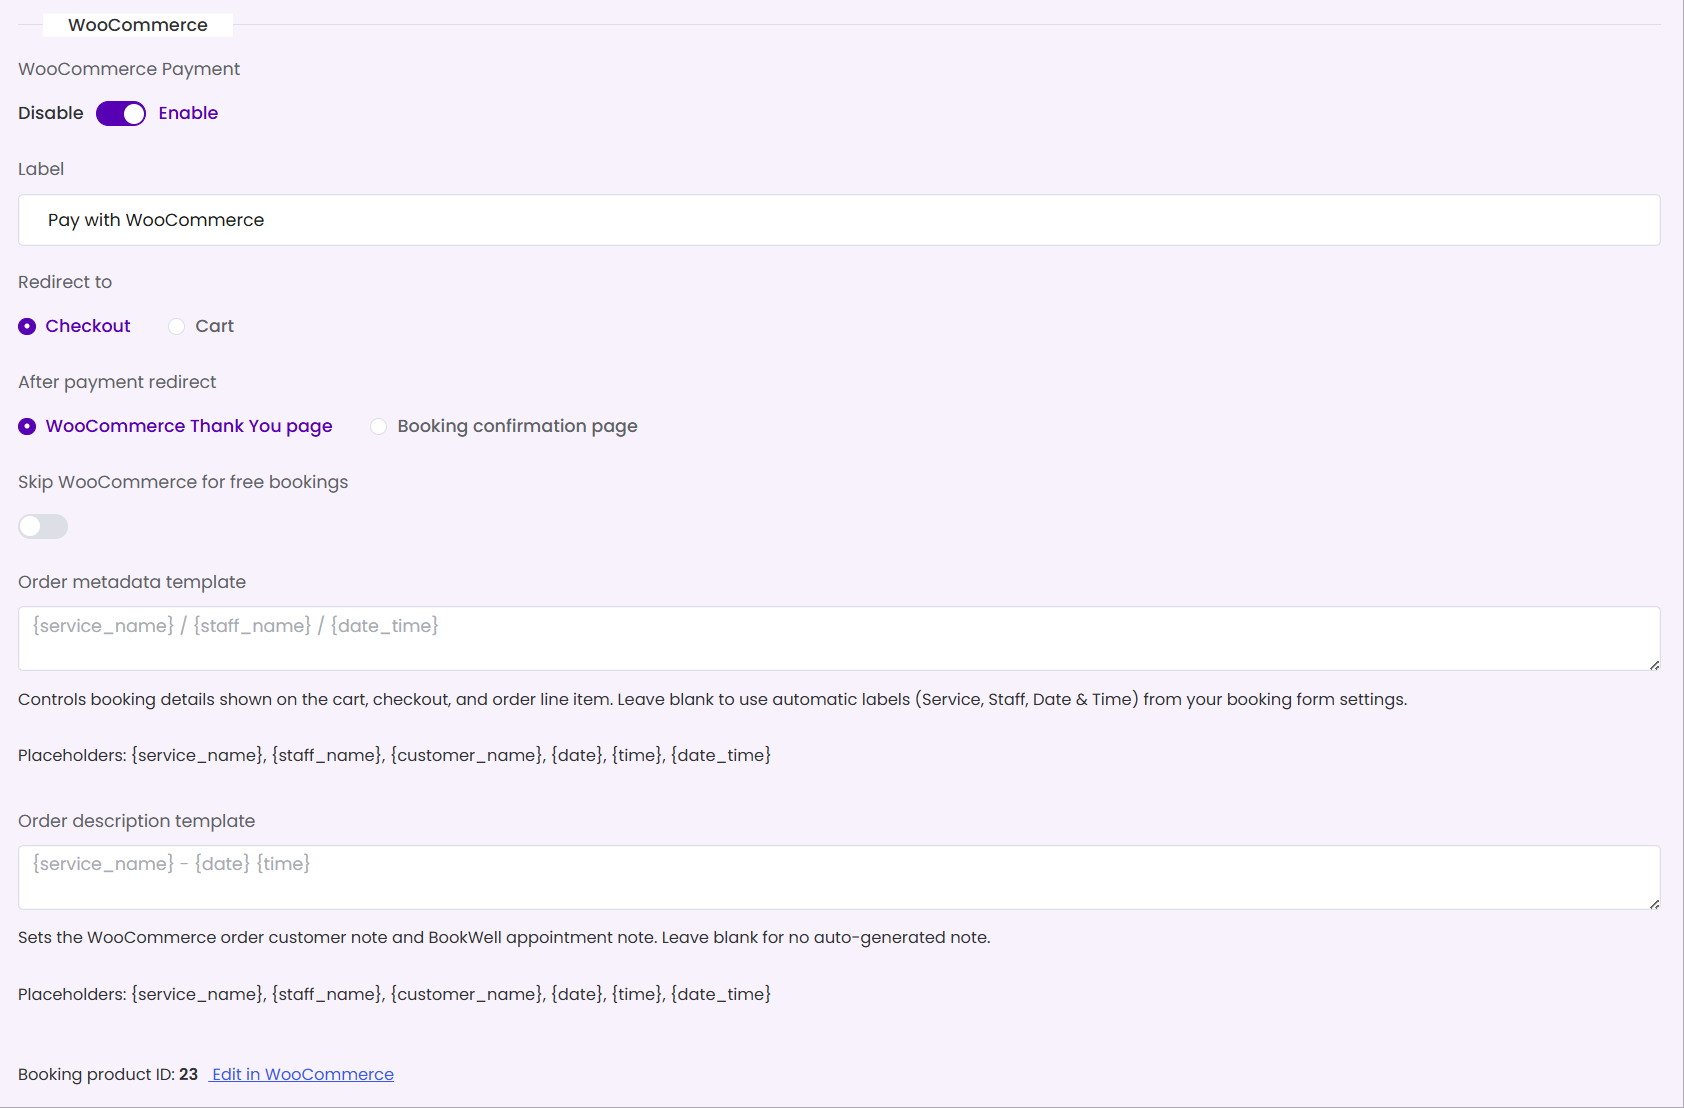
- WooCommerce Payment: Toggle to Enable to activate WooCommerce integrations.
- Label: Customize the payment gateway text (e.g. “Pay with WooCommerce”).
- Redirect to: Choose whether checkout links route to the WooCommerce Checkout page or the Cart page.
- After payment redirect: Redirect users to the WooCommerce Thank You page or BookWellNow’s Booking confirmation page post-purchase.
- Confirmation page: Specify the page template containing the booking shortcode, or leave as default.
- Skip WooCommerce for free bookings: Toggle on to bypass WooCommerce cart steps when booking zero-cost services.
- Order metadata template: Set text details shown on WooCommerce carts, orders, and emails using variables (e.g.
[service_name] / [staff_name] / [date_time]). Available placeholders:{service_name}, {staff_name}, {customer_name}, {date}, {time}, {date_time}. - Order description template: Customize customer/appointment notes (e.g.
[service_name]: [date] [time]). - Booking product ID: Displays the linked WooCommerce Product ID. You can click Edit in WooCommerce to modify the product record.
Step 5: Set Order Status Sync Rules
This grid allows you to map specific WooCommerce order statuses to the corresponding BookWellNow appointment booking statuses and payment statuses. This ensures statuses sync automatically when orders are processed or updated:
- Pending payment (Apply on Order created) ➔ Booking Status: Pending | Payment Status: Pending.
- On hold (Apply on Order created) ➔ Booking Status: Pending | Payment Status: Pending.
- Processing (Apply on Order updated) ➔ Booking Status: Pending | Payment Status: Pending.
- Completed (Apply on Order updated) ➔ Booking Status: Approved | Payment Status: Received.
- Failed (Apply on Order updated) ➔ Booking Status: Cancelled | Payment Status: Failed.
- Cancelled (Apply on Order updated) ➔ Booking Status: Cancelled | Payment Status: Failed.
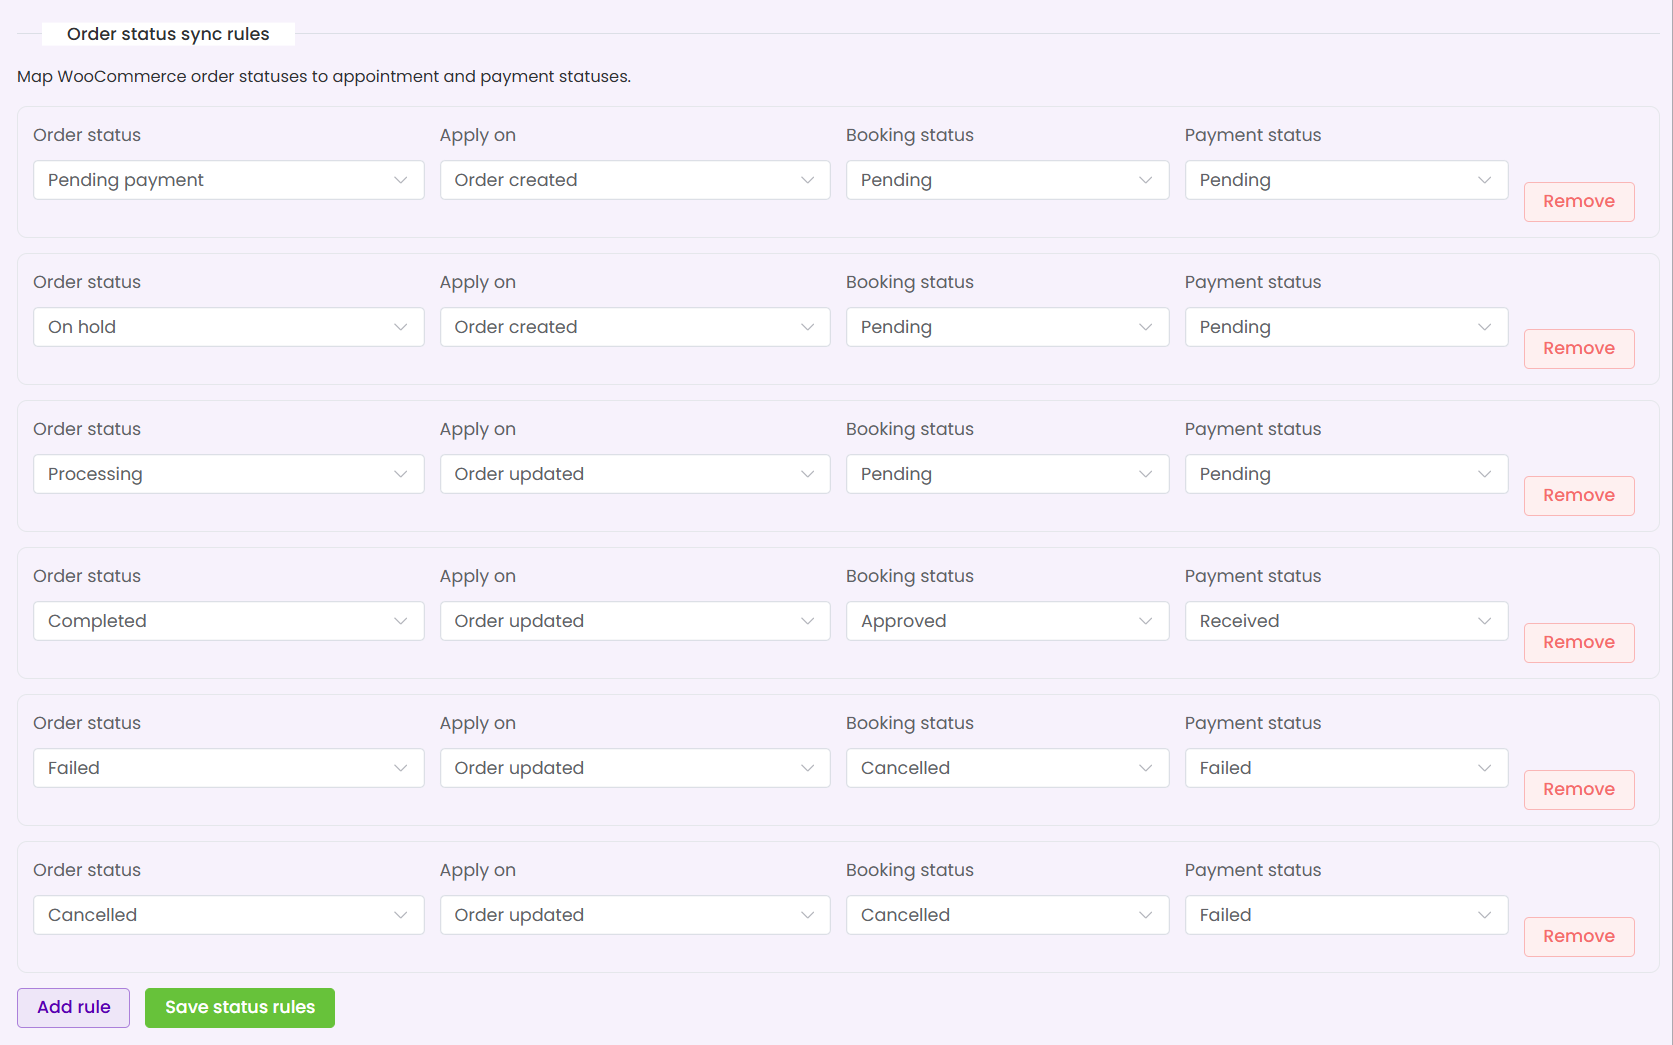
Click Add rule to create a custom mapping, or click Save status rules at the bottom of the grid. Click the primary Save Settings button at the top-right of the page to save all gateway modifications.
Free and Pro payment availability
Pay on Arrival and PayPal Checkout are implemented in Free. Configure the payment method in Payment Gateway Settings and test both successful and cancelled bookings before accepting payments.
WooCommerce payment integration — Pro
WooCommerce integration requires a valid Pro license, the WooCommerce module enabled in Pro add-ons, and WooCommerce installed and active. It connects booking checkout to supported WooCommerce gateways. Configure your gateway in WooCommerce and use its sandbox or test mode for verification.
Test payment success, failure, cancellation and resulting appointment status. Gateway charges, external account requirements and refunds depend on the selected payment provider. Standalone Stripe is a separate Pro capability and is outside this 35-feature inventory.